Here’s my first attempt at a tutorial and it’s for something… just okay looking. I stress that. I think these can look better if you take more pains to load them full of clump foliage–I may even revisit them and add more down the line. But for now, here’s what I’ve got!
The process involved the following materials:
- Self Adhesive Rubber Trim 1″: I have some of this laying around from a car project. You want rubber trim that is one inch thick and rounded. Here’s an example off ebay: https://www.ebay.com/itm/294842580475?mkcid=16&mkevt=1&mkrid=711-127632-2357-0&ssspo=h3QcdhfFRvS&sssrc=2047675&ssuid=&var=593679871011&widget_ver=artemis&media=COPY
- Popsicle Sticks 1″: can be found anywhere. Make sure they match the width of your rubber.
- Trees: I’m using H/O scale railroad trees of varying sizes. As I intend these to work with both 15mm and 28mm, I tried to skew toward smaller trees, which will be ‘big’ in 15mm and ‘small’ in 28mm.
- White Glue: standard for hobby projects. You’ll mix it with water.
- Super Glue and Tissue Paper: for attaching the trees.
- Spray Bottle: for the white glue mixture.
- Alcohol: also for the white glue mixture.
- Flock: both regular and clump foliage varieties. I like the stuff sold by Woodland Scenics. It’s cost effective but bulk.
- (OPTIONAL) Sand: I made a mixture of glue, paint, and sand to base coat everything brown. This is optional.
So the general process here is simple. You’re going to cut the rubber to the sizes you want, glue those to the popsicle sticks, then prime/paint brown, then flock. After this you use the glue mixture to soak everything, let it dry, and repeat as many times as you can tolerate.
Step 0: Mis-en-place / Mix Aheads
You’ll need the following mixtures:
- The Flock Glue: Mix brown paint, glue, and water (I do about 10:40:50). Add sand if you have it. You’ll use this for getting the initial flock on.
- The Spray Glue: Mix a few drops of alcohol (important! Not a lot!), then 50:50 water and glue in a spray bottle. You can thin it a little more if you want. This will be used to harden everything.
- Flock: Mix up some flock ahead. I recommend mixing various colors and trash. I mix in some dry Italian seasoning for texture.
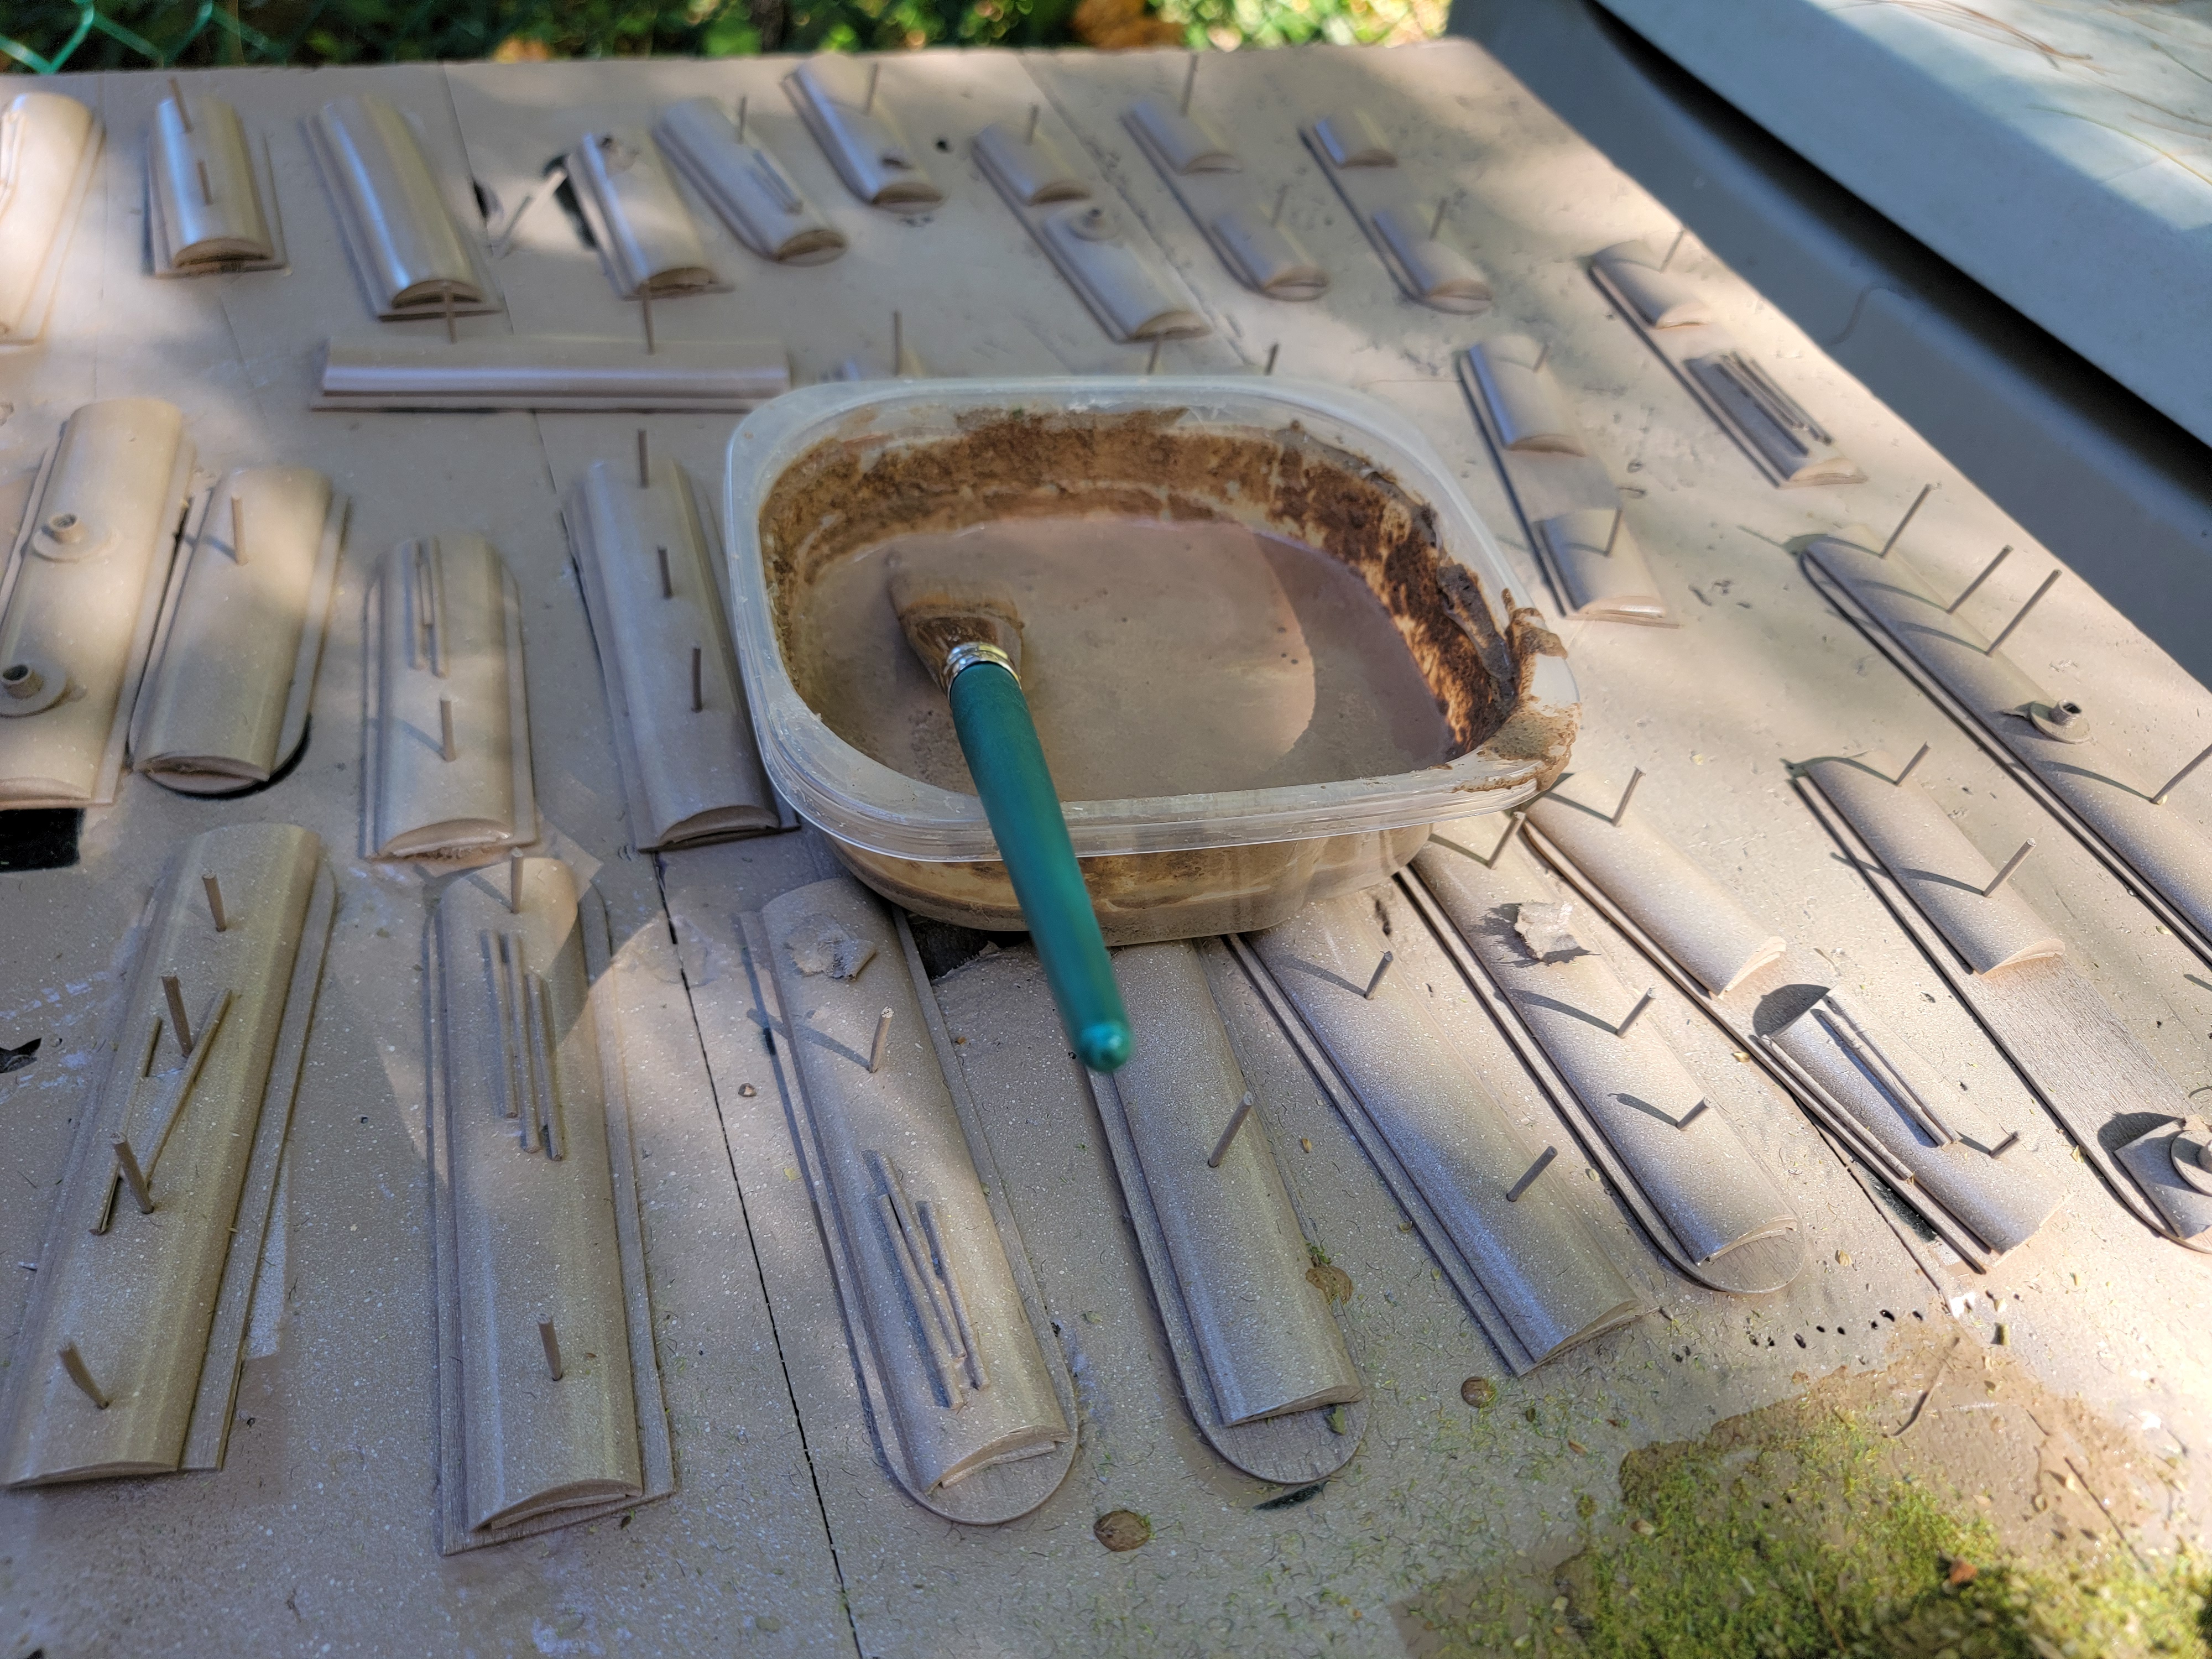
Step 1: Attach Your Rubber
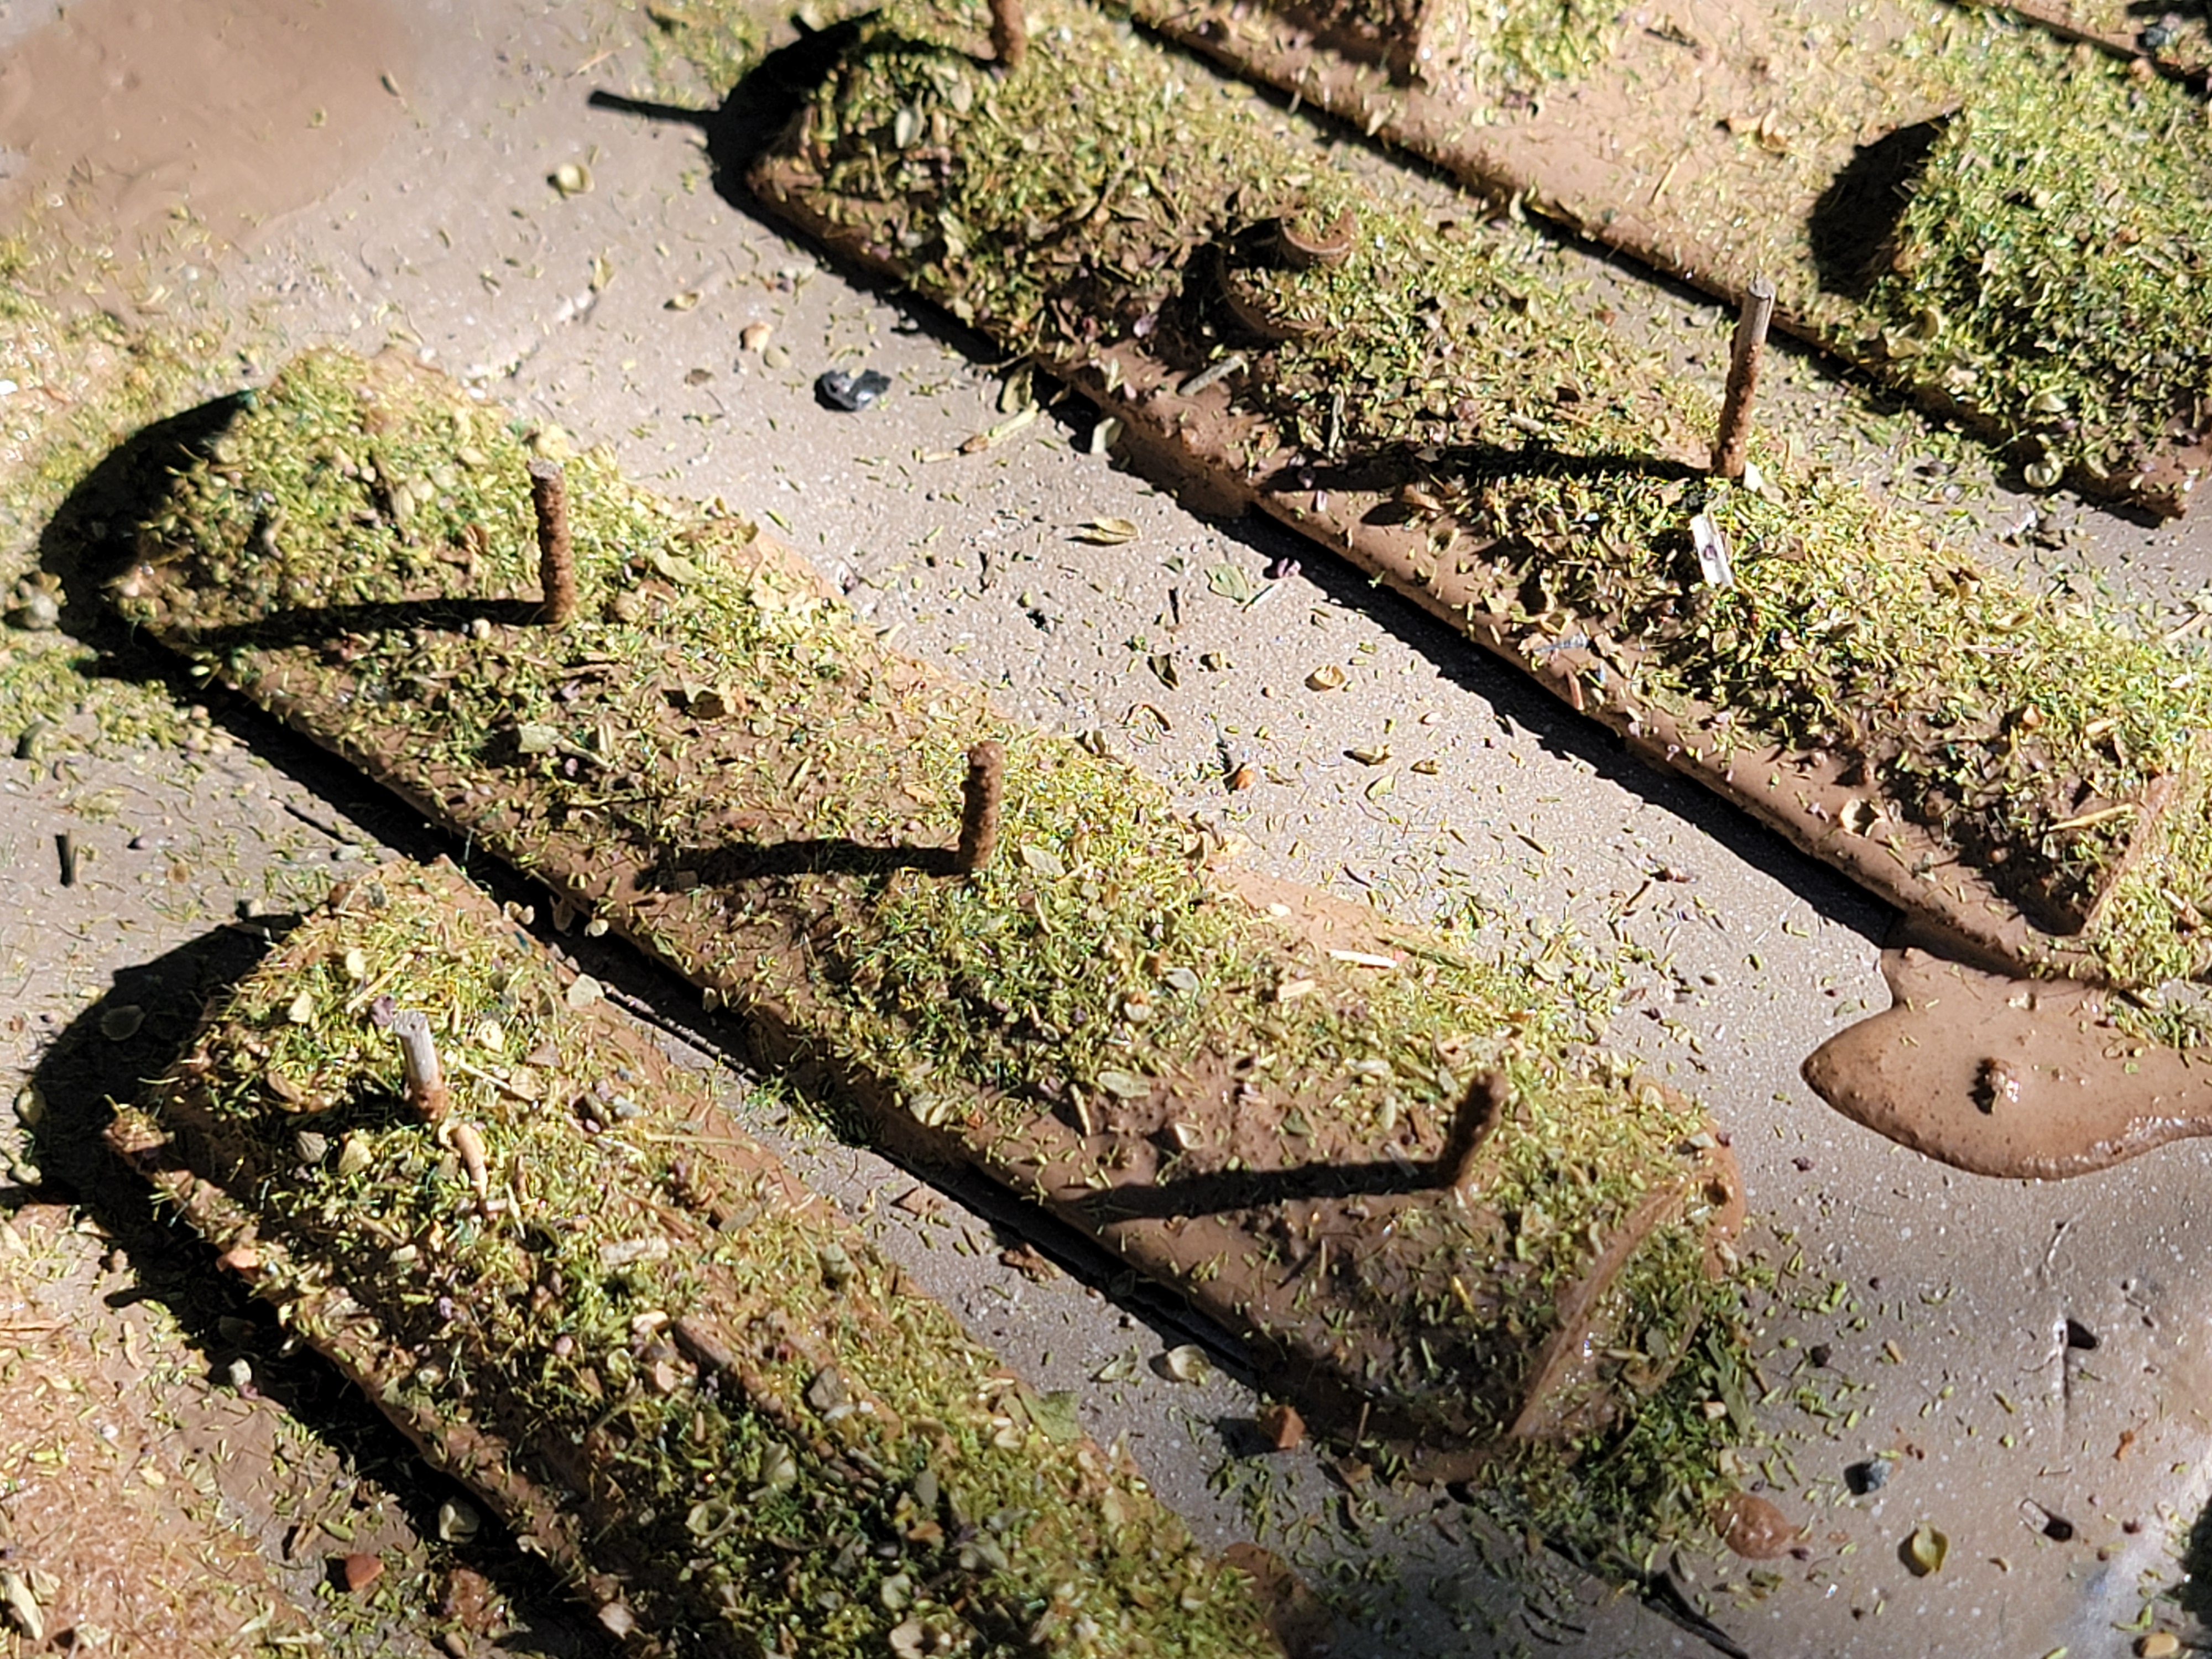
Again, simple: it should have a peel off backing. Cut both the popsicle sticks and rubber strips to similar sizes, then attach them. After this, you’ll need to make holes or attach bases for any trees you intend to add to hedges. See the second photo just below.
To glue these on: I use a dab of super glue and some tissue paper. The tissue paper and superglue makes for a stronger bond that is less brittle than just super glue. This helps keep the trees attached over time.

As an optional, REALLY TIME CONSUMING step: you can then further poke holes into the rubber and add toothpicks. I don’t believe this is worth your time and would not do it again. I DO recommend adding any rocks, tree bases, scatter, etc. You’ll note I used toothpicks and build little cross bars. You can also see I left some gaps–the intend here was to make breaks in the trees where I could add fences if I wanted to. I didn’t in the end because I wanted to flex this set between 28mm and 15mm.

Step 2: Prime/Paint it Brown
I went and got a matte brown Rustoleum (automotive) primer from the hardware store, then went to town. You could, of course, prime any color and then paint it brown.
As seen here: I primed them brown. This is in case any of the base color leaks through. Brown will fit naturally.
Step 3: Paint the Texture Paste on and Flock
The title says it! Paint your texture paint onto all of the pieces, then drop flock on them. I recommend being inconsistent with the flock so some dirt shows through in places. Pay attention not to clog any holes or bases for trees.
Allow this to dry. This generally takes 24 hours to fully set.
Step 4: The Clump Foliage
Now that stuff has dried, I fix on the clump foliage. I do so first with super glue and take my time, especially affixing it to the toothpicks (if you did them, which I don’t recommend). While you do this, you can also add your trees into their bases or holes if you made them.
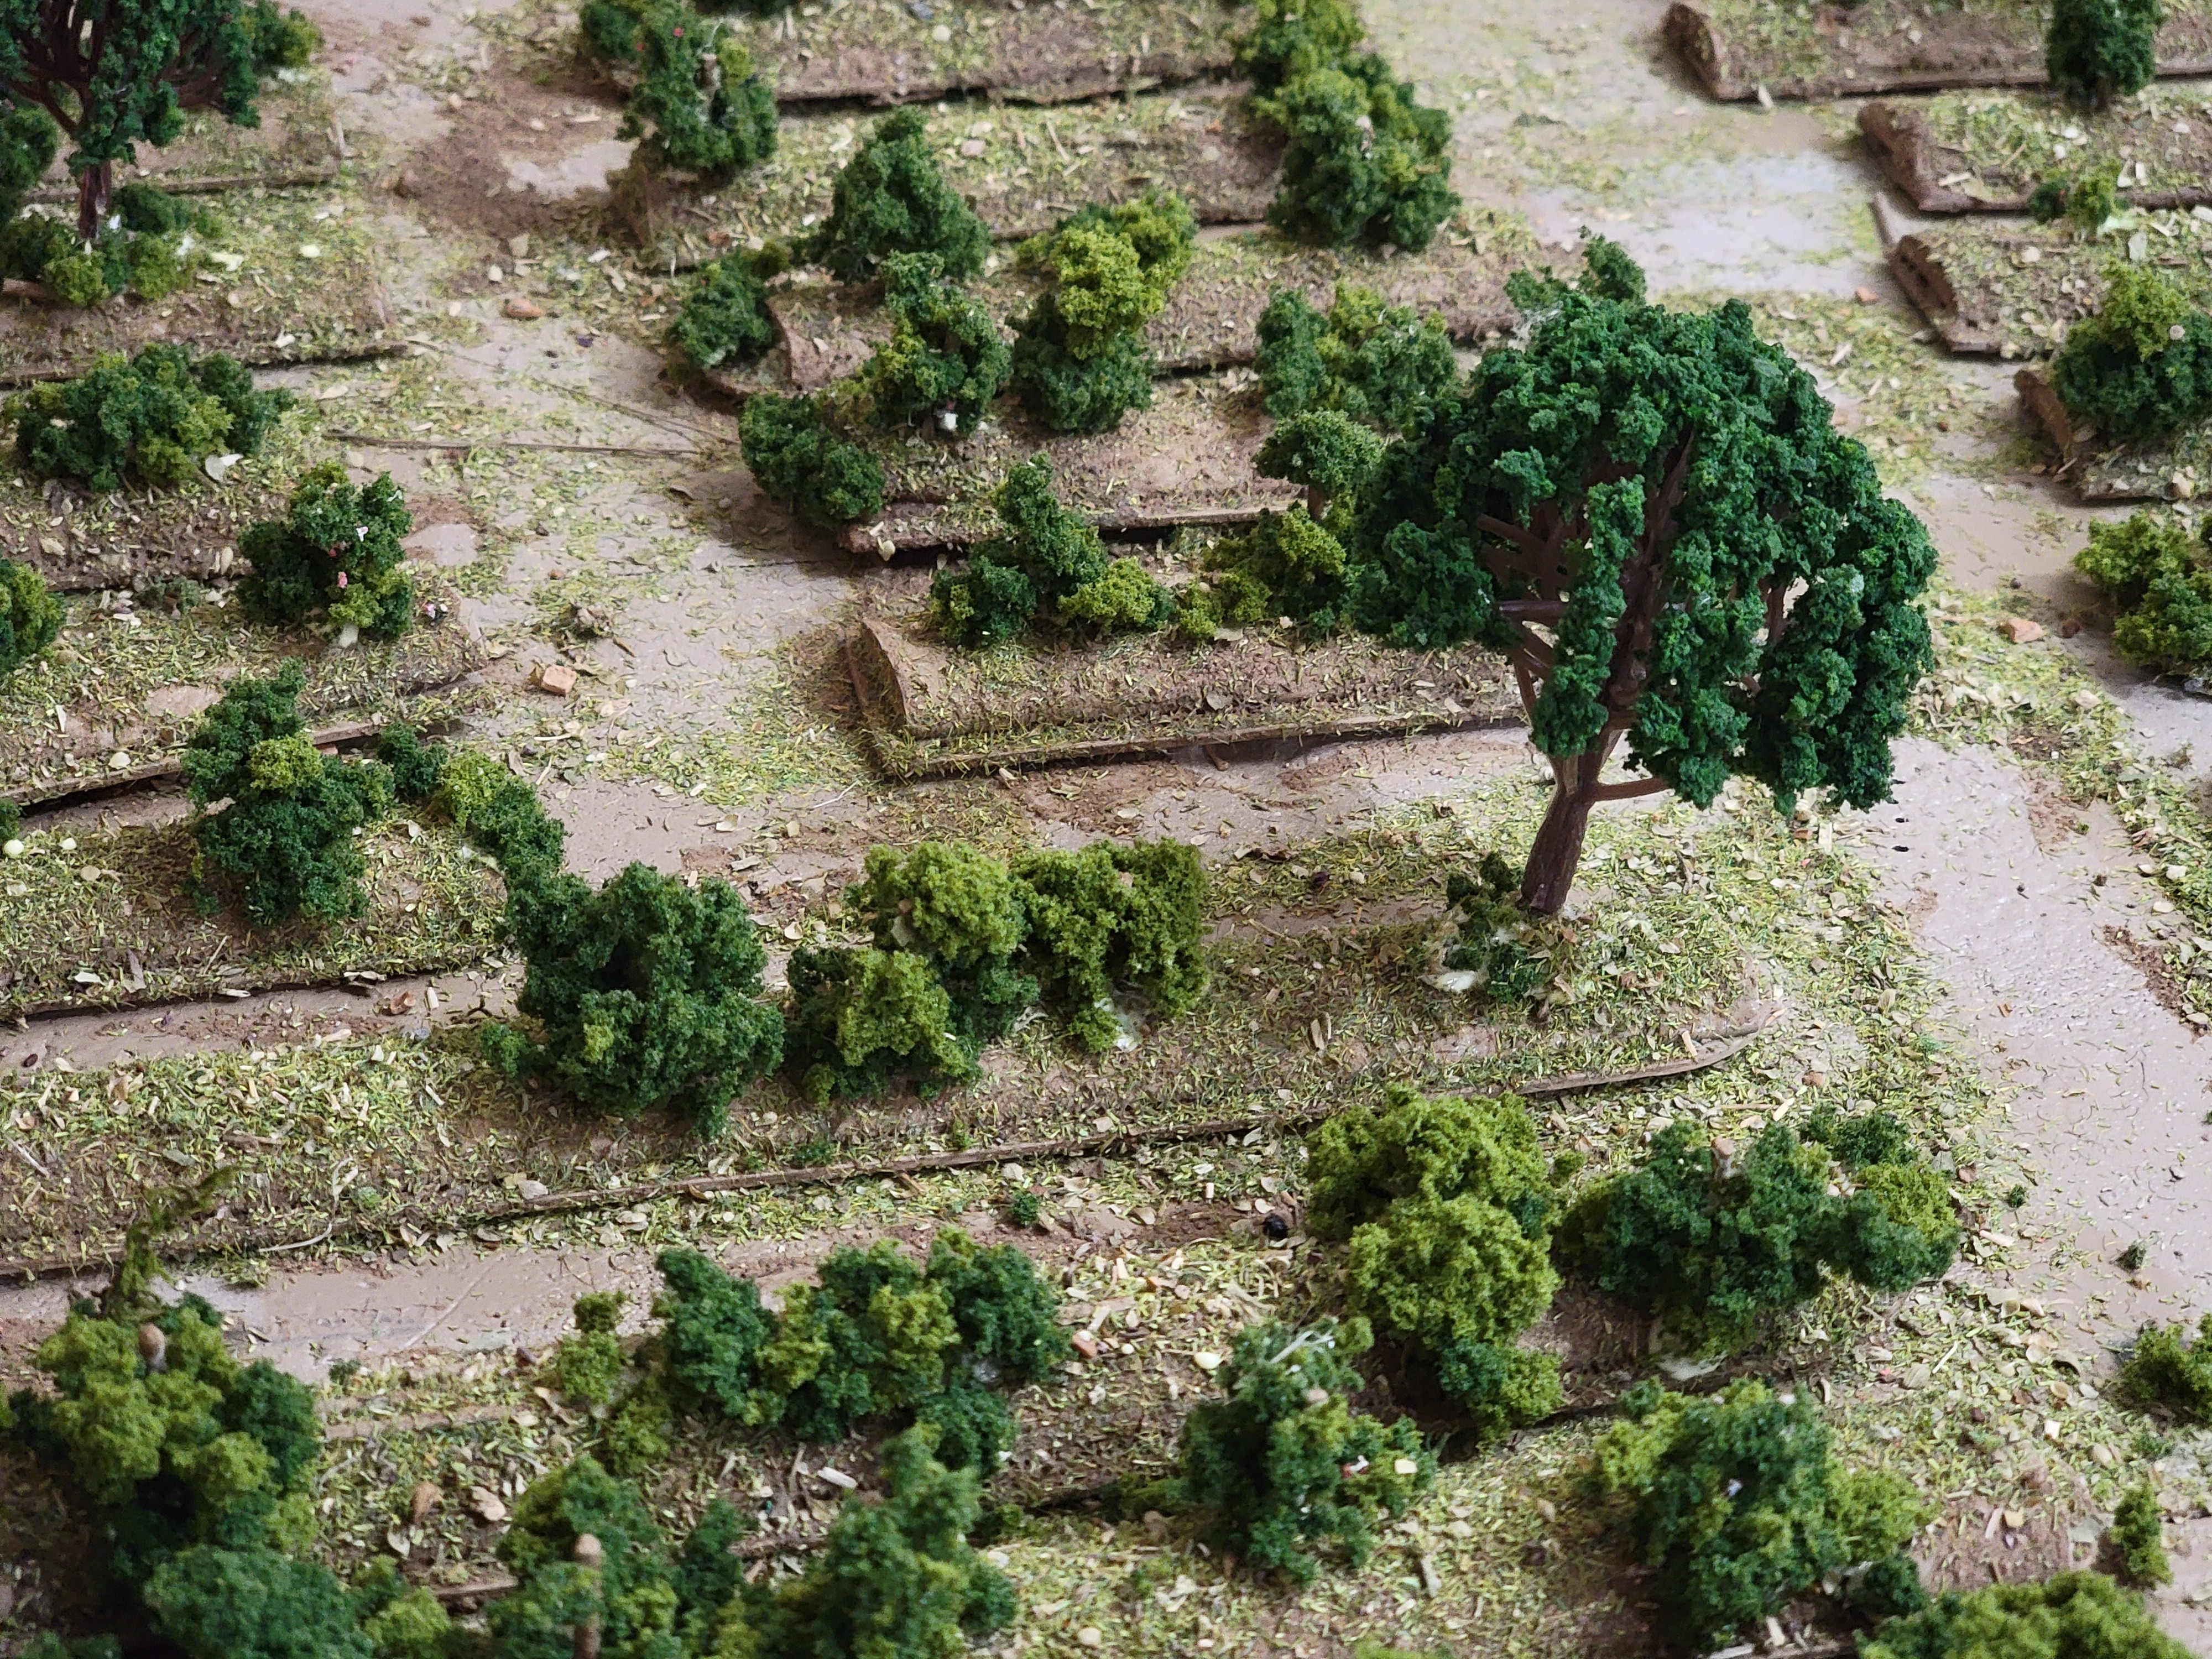
Your pieces should now look like end products. Once you’re happy with them, we get to the final, most annoying step.
Step 5: Glue, Baby, Glue!
Use your spray mixture of glue and spray the living goodness out of everything. Really soak it. It’s important that everything is dry before you do this. Allow it to sit for 24 hours, then do this again. Keep doing it until you’re tired of doing it. I literally did it 5 times for this set. This will help prevent the clump foliage from falling off. It’s the most annoying step due to the long dry times. You’ll need space to let these dry for a long period–hopefully you have a basement or shed or forgiving wife.
Mine didn’t seem to like me keeping it on the kitchen counter so I could watch it dry. Go figure.
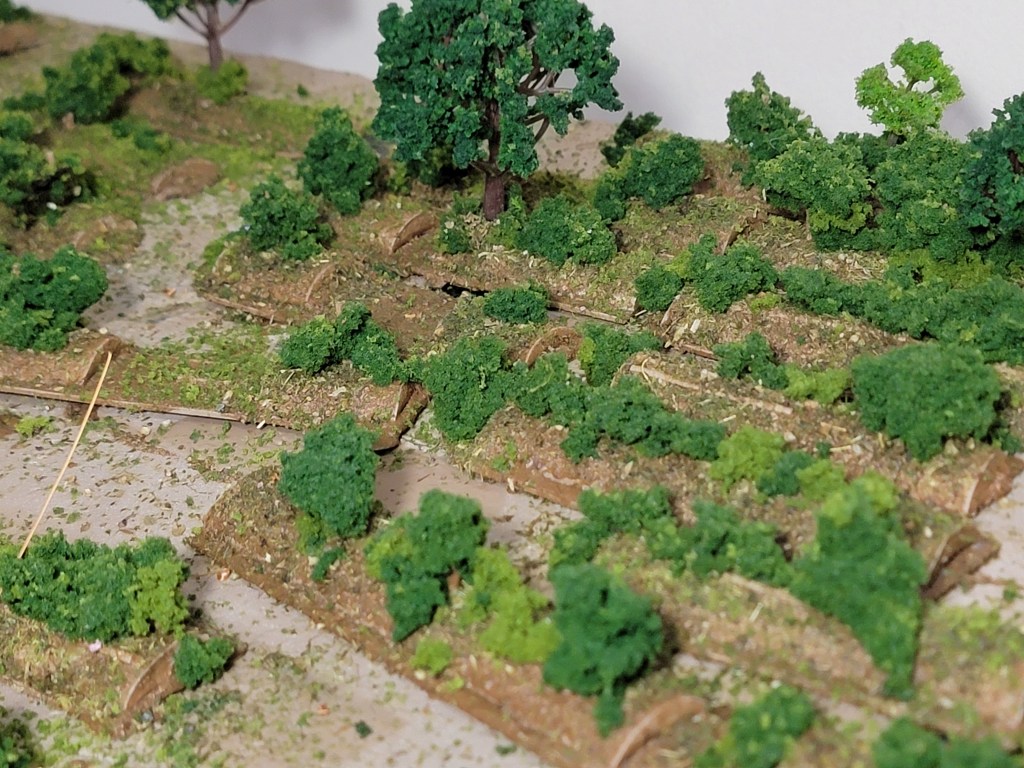
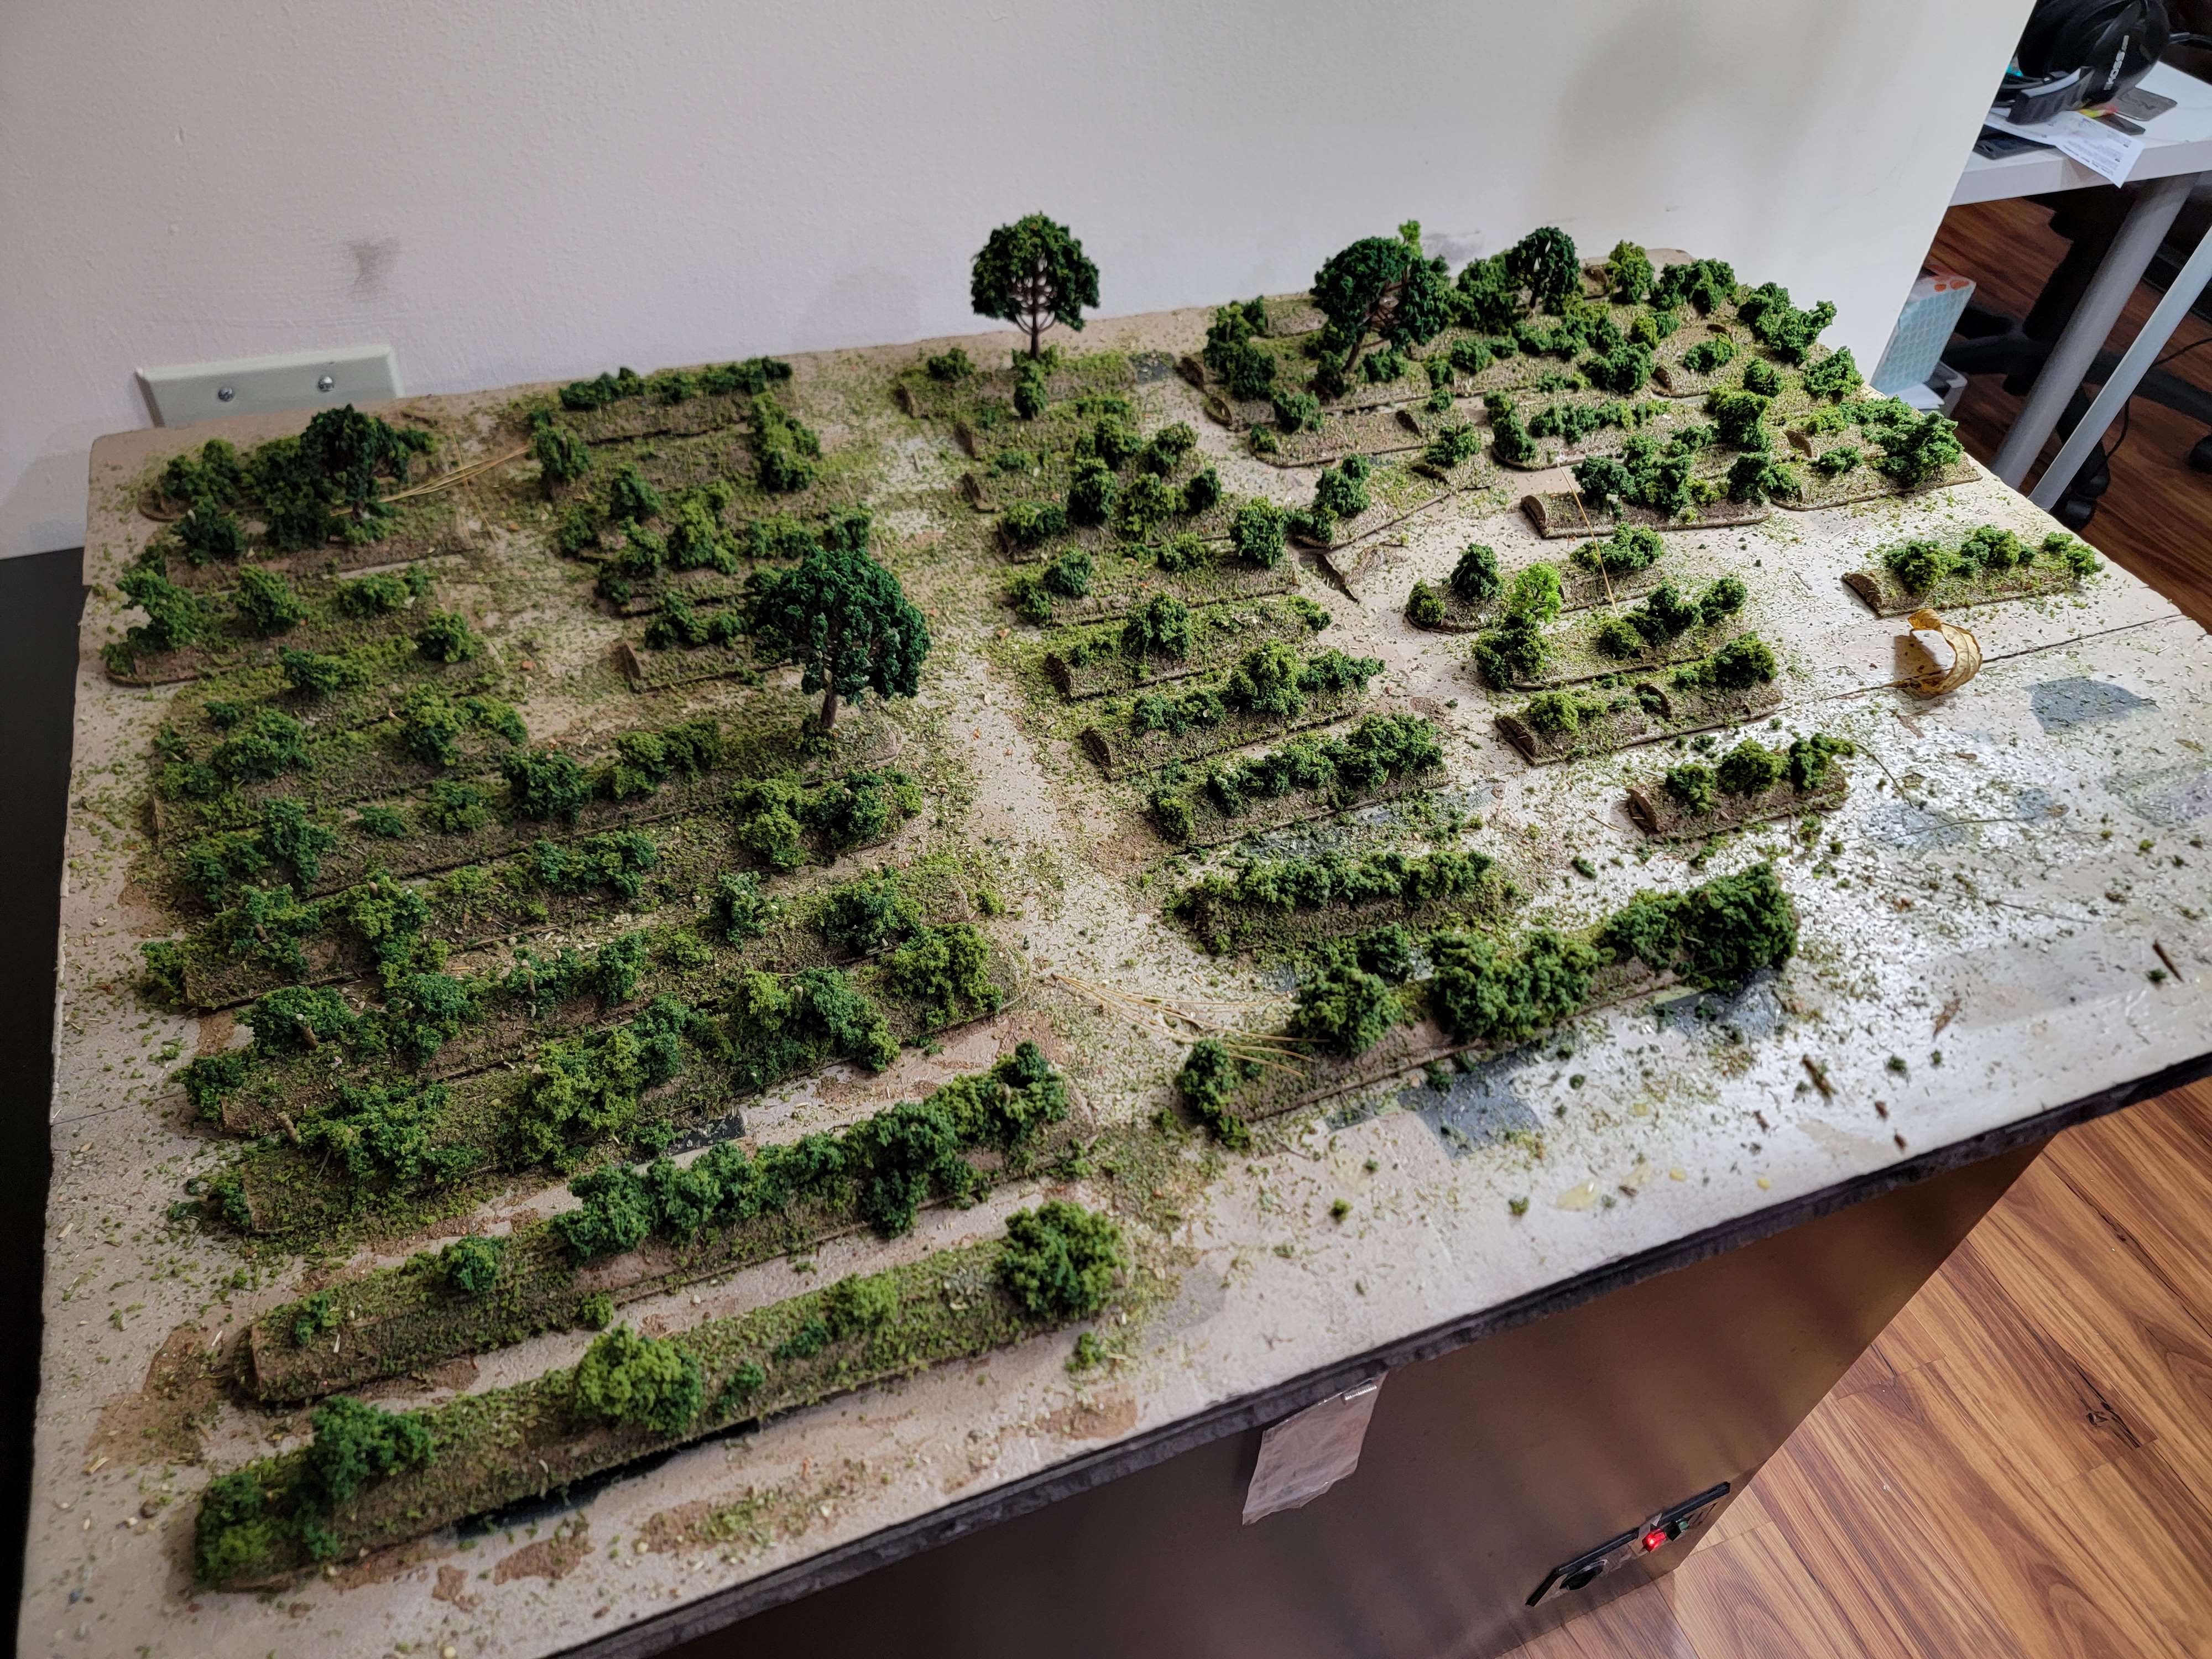
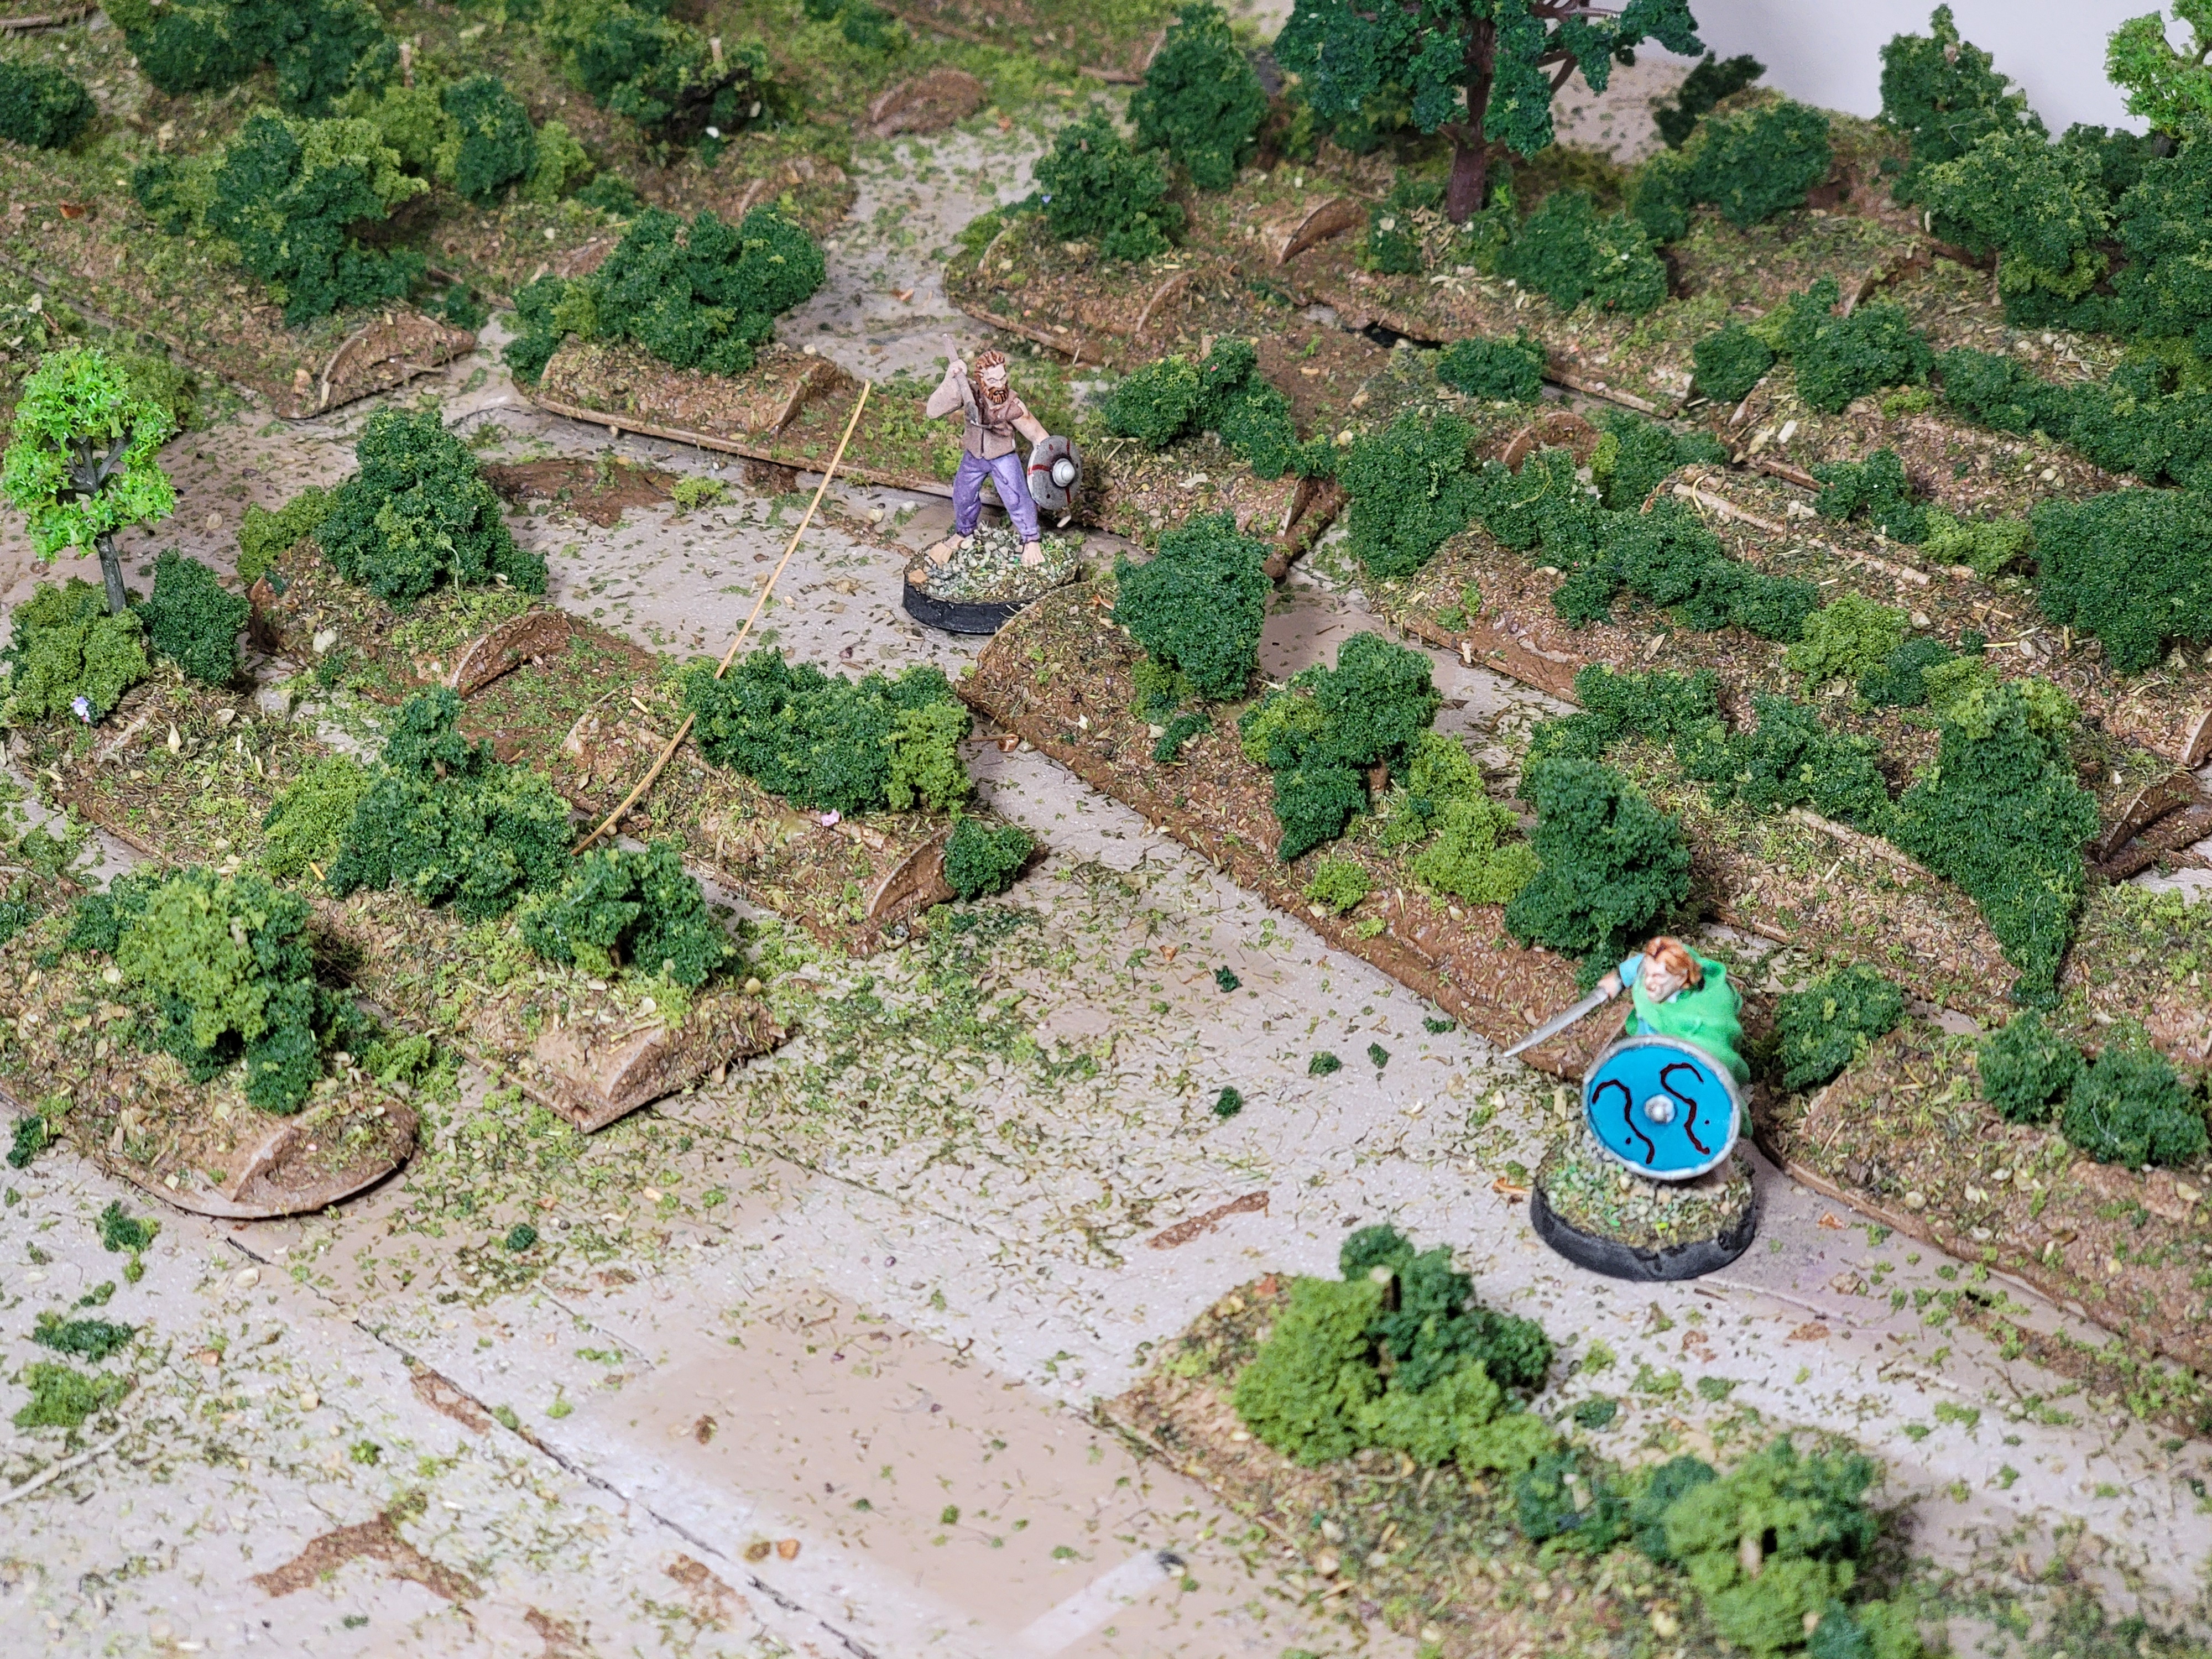
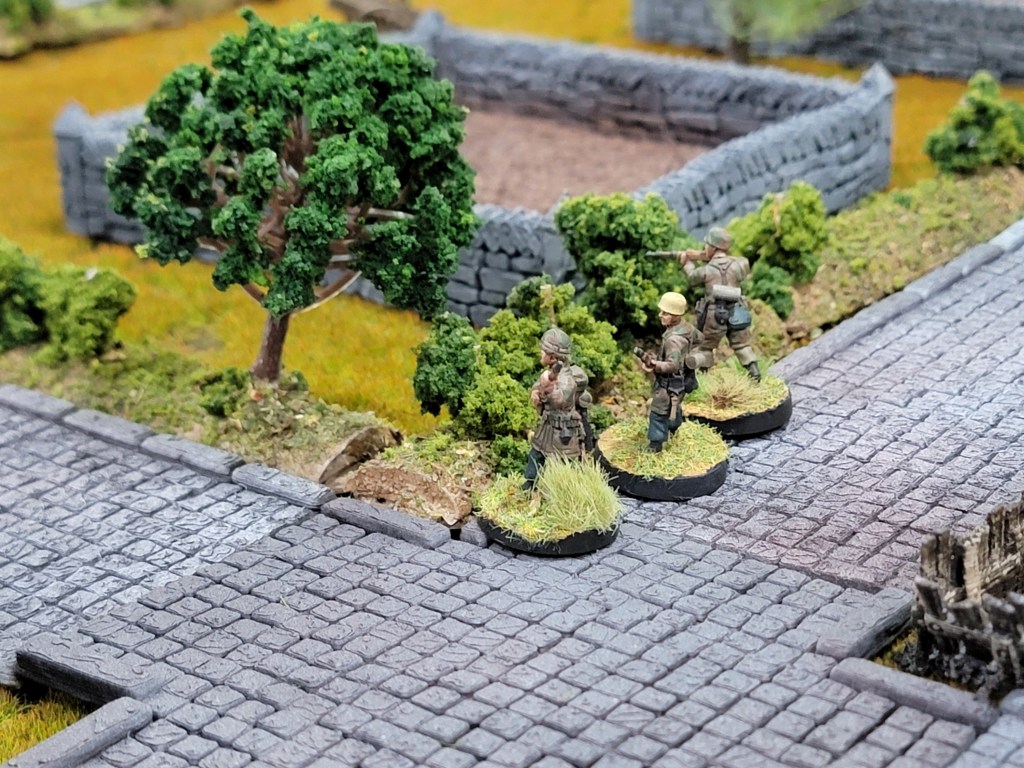
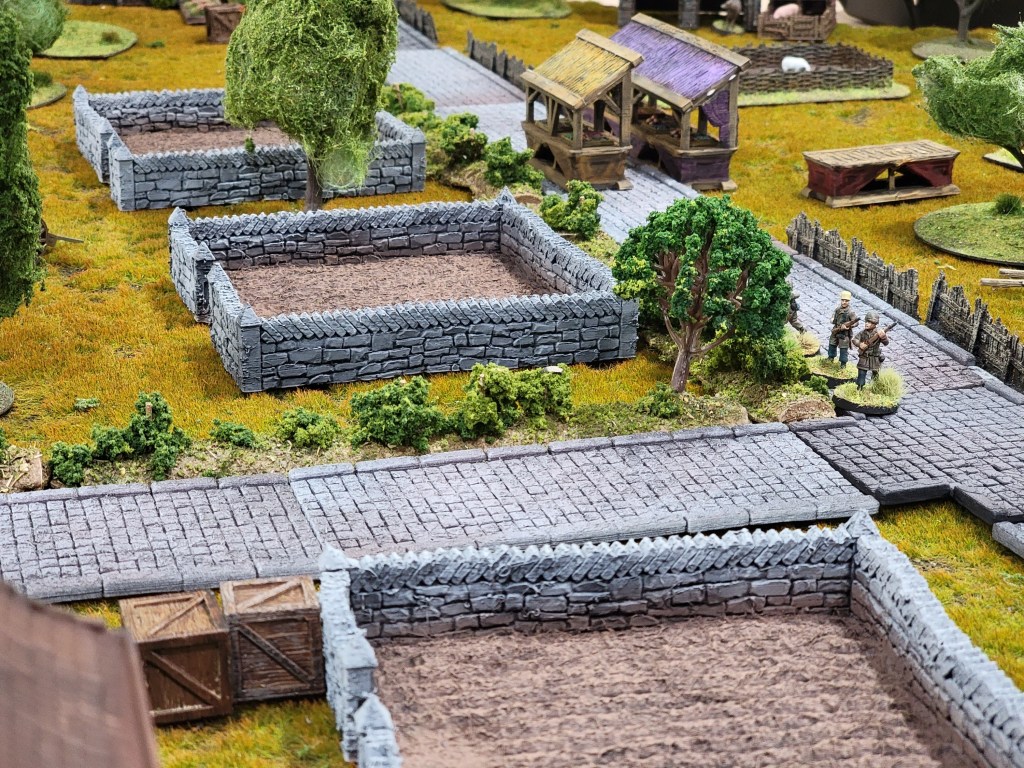
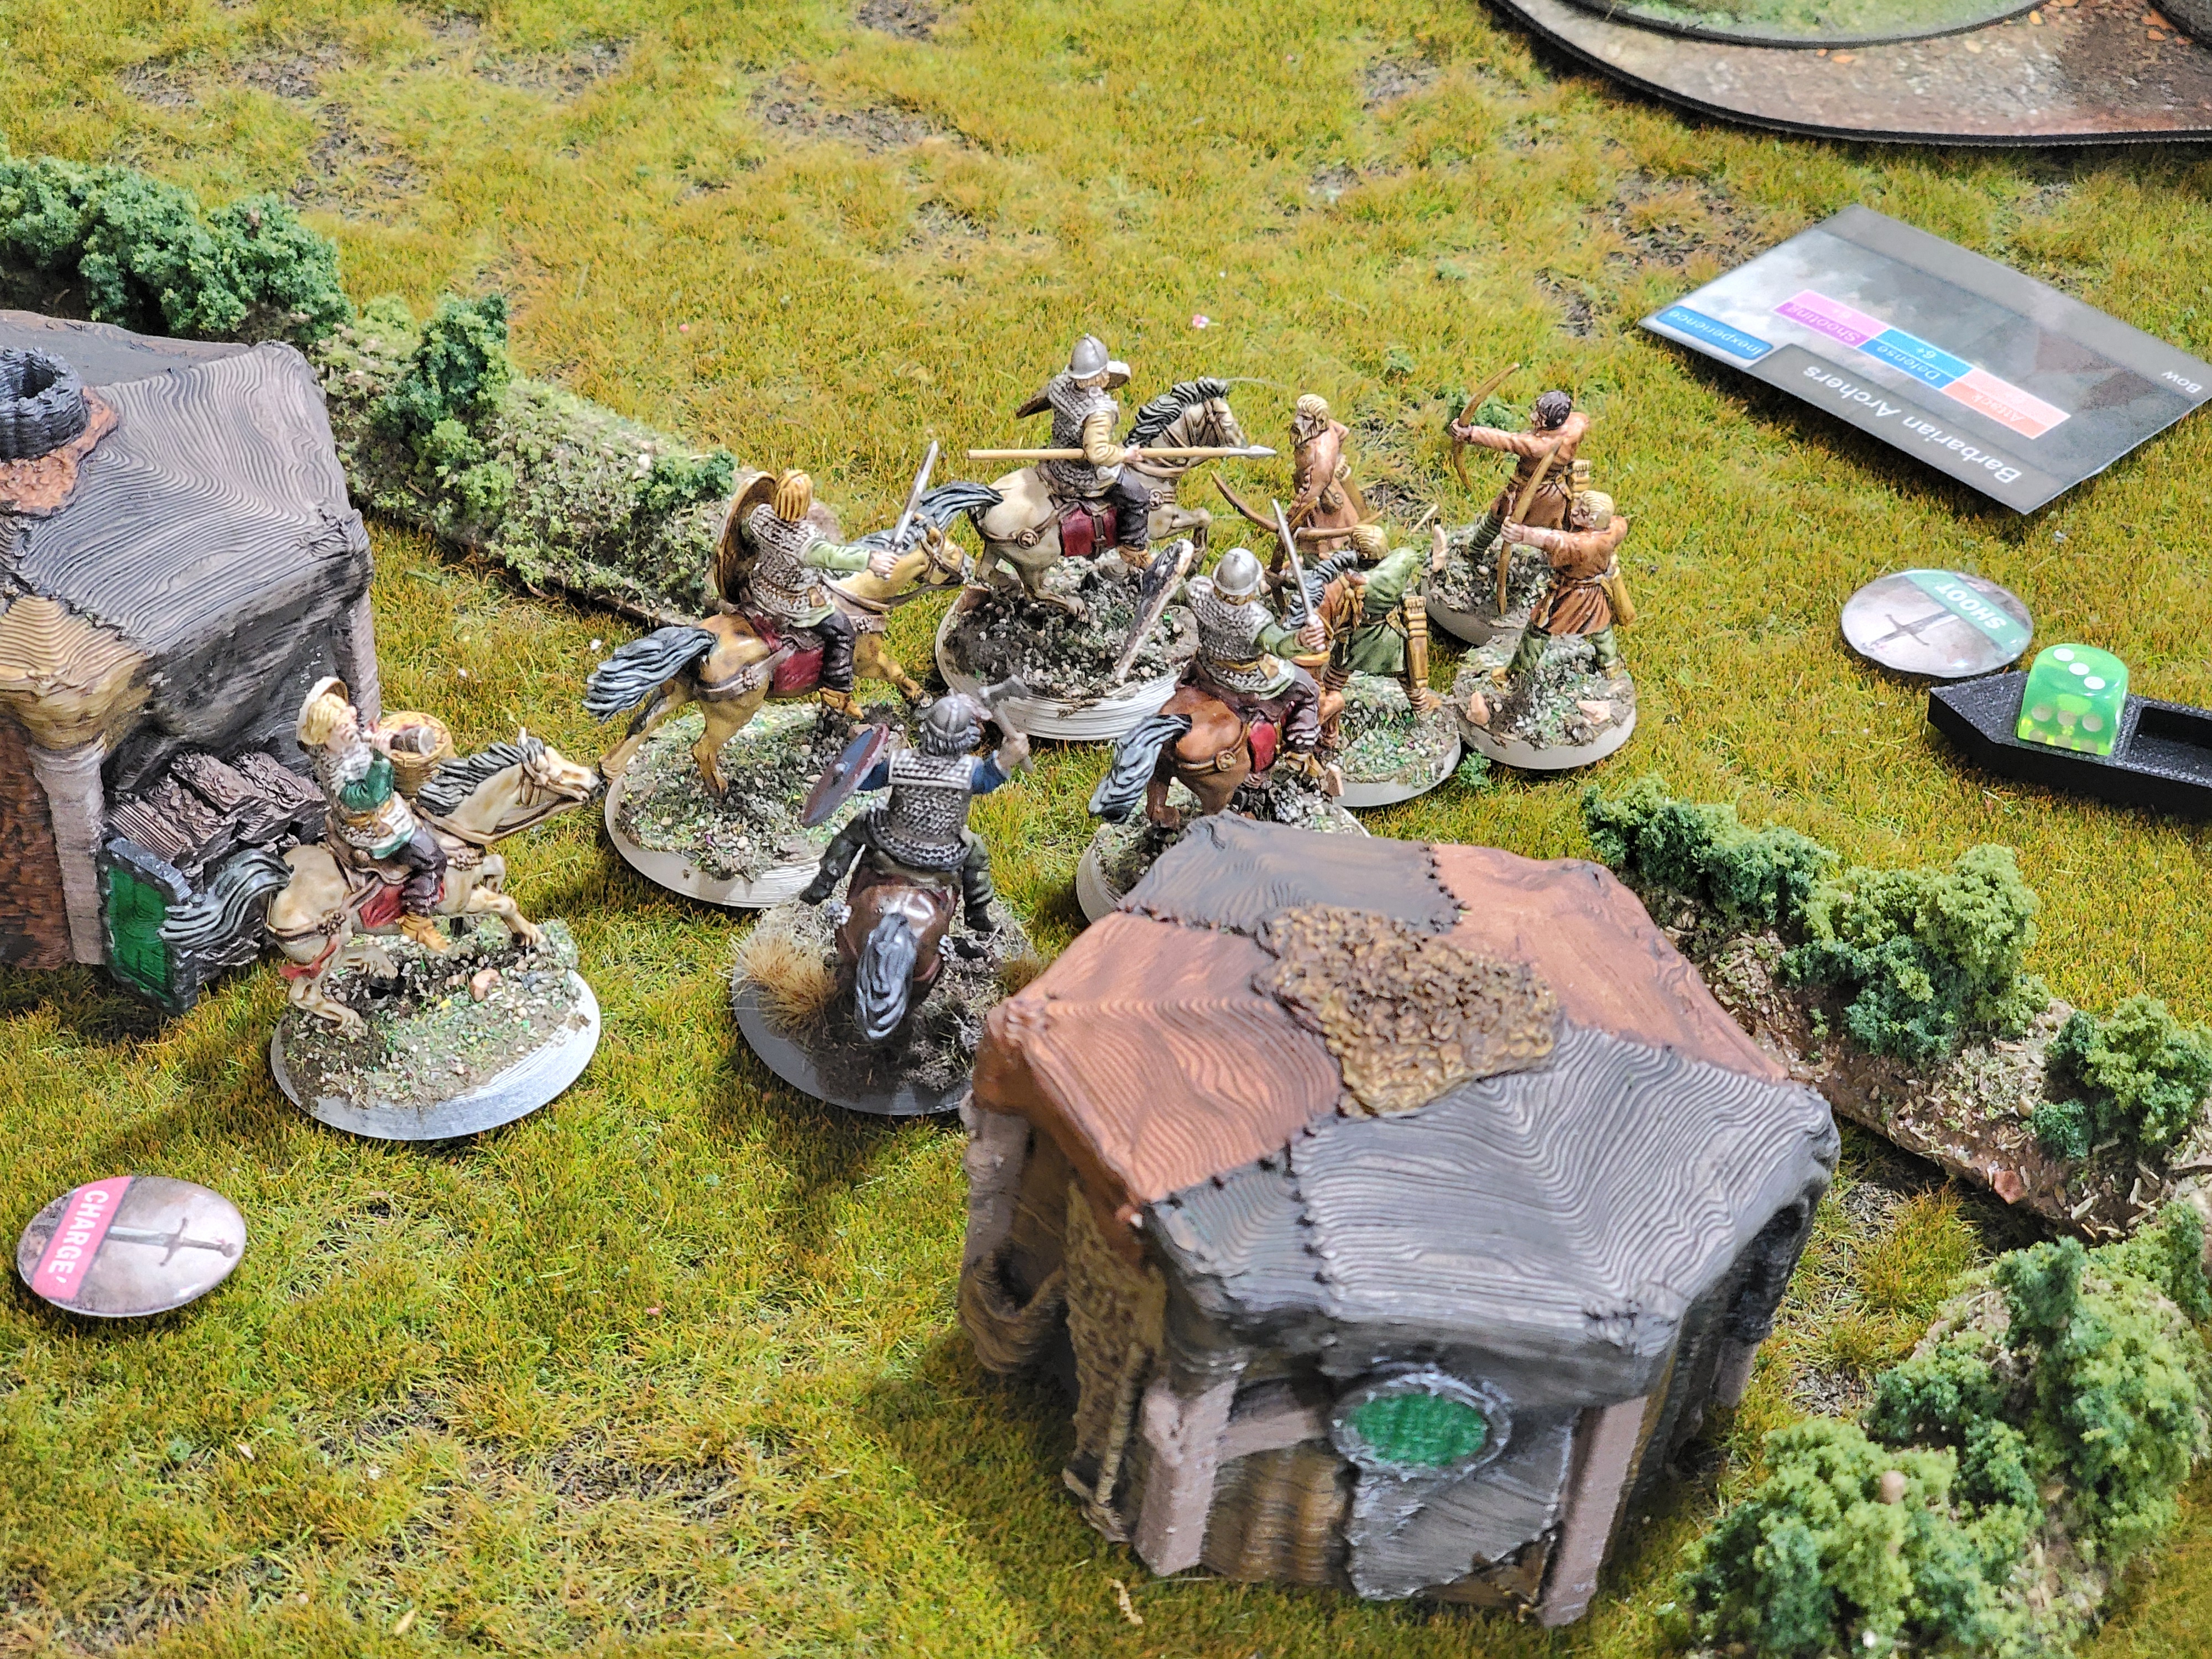
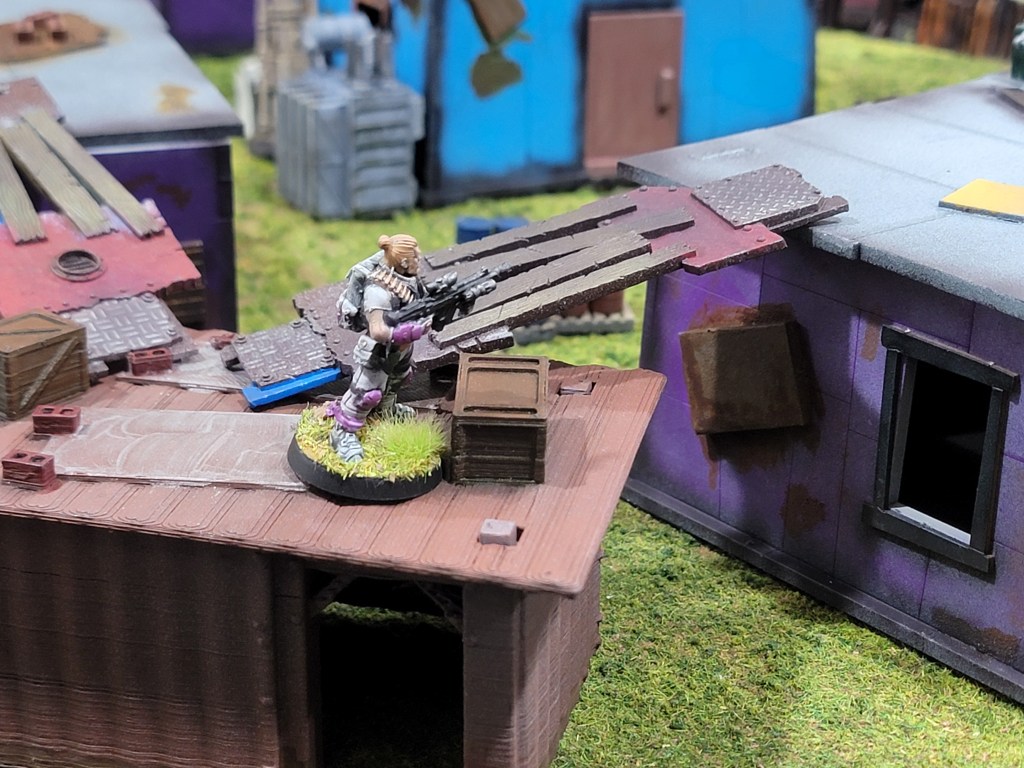
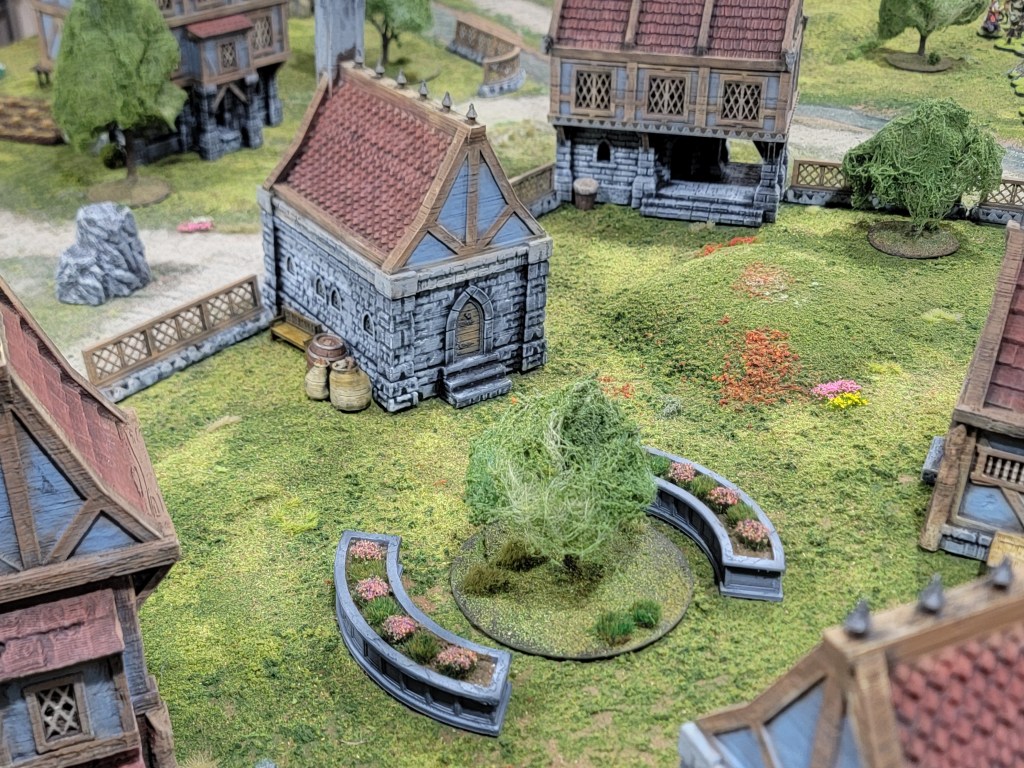
Conclusion and Photos
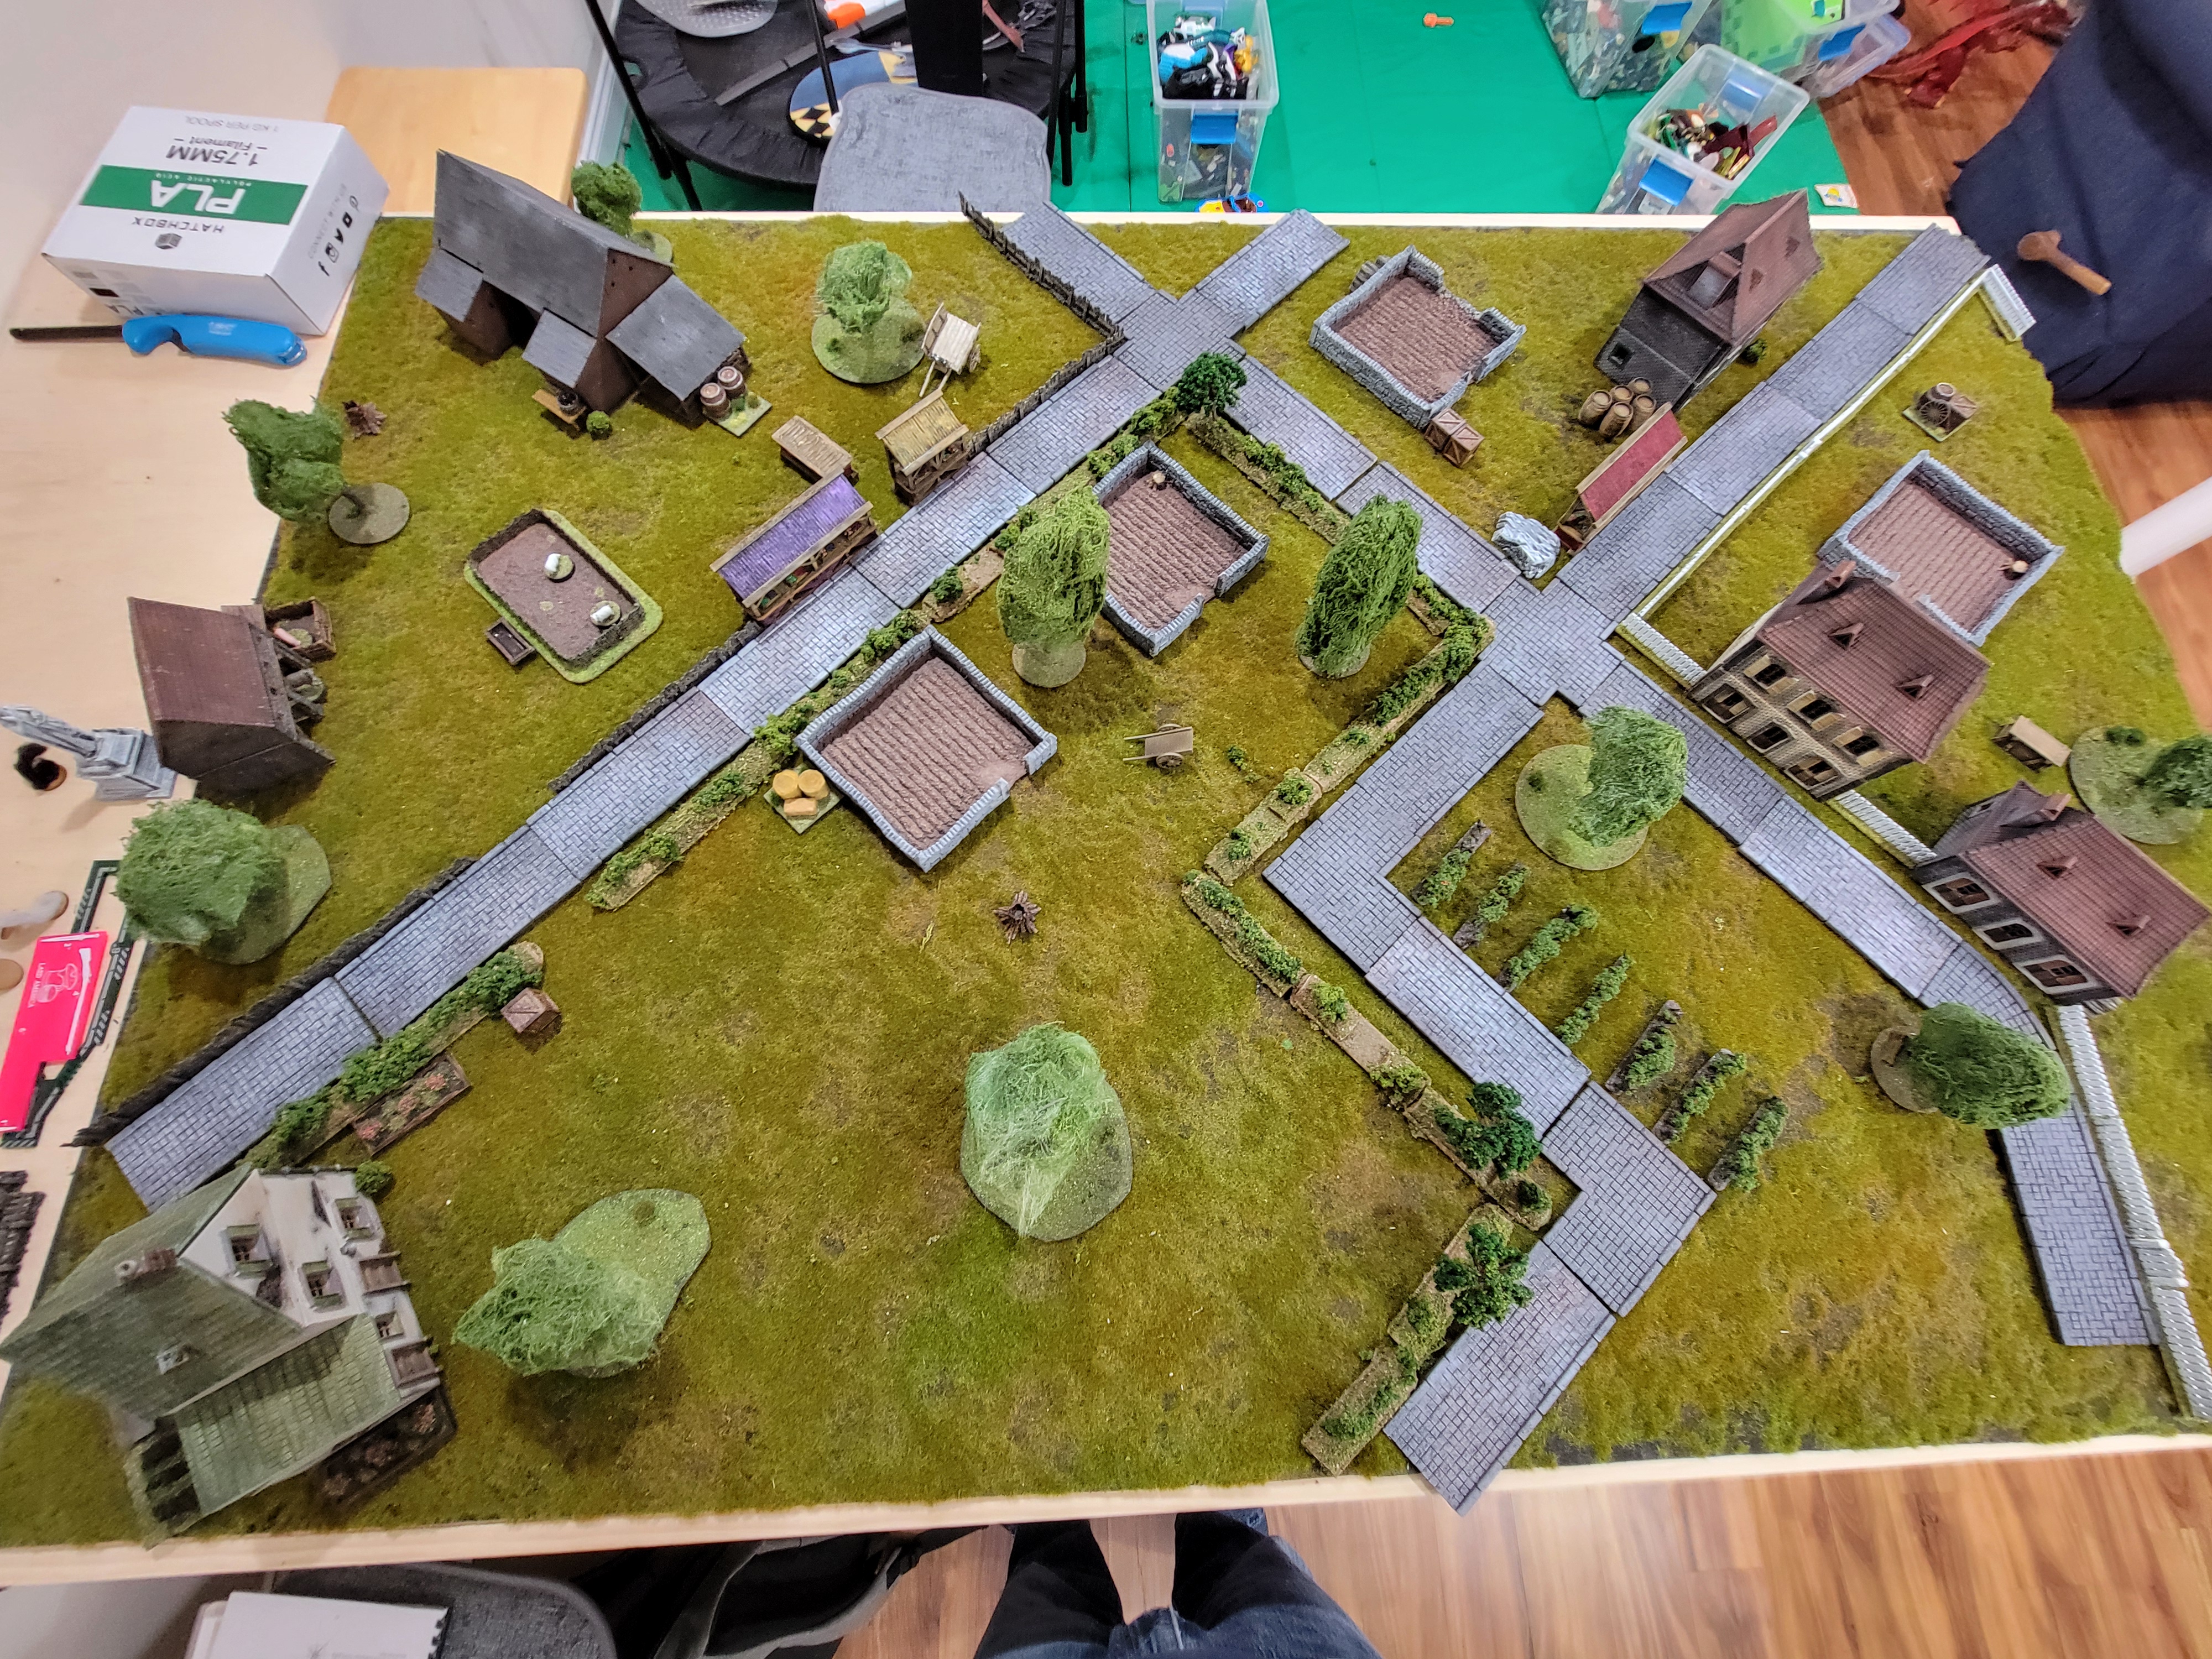
Here’s a few photos from games I’ve played to give you an idea of these in action. They’re far from perfect but as I’ve used them, they’ve grown on me. I think if I went a little crazier with the clump foliage they’d look a lot better. The project overall cost me about $40 in material for 20 feet of hedges. I’m mixed on this–that’s a lot for an okay product. I had actually considered buying prefab hedges but now I see why their prices were so ridiculous. It’s hard to make this product and really have it look good. The same amount of hedges could sell for $200 online. I get that now.
If you decide to make this, let me know–especially if you improve the process or find a way to make the edges of the rubber look less harsh. I tried to make this as streamlined and simple as I could. I’m not a fan of sanding or laborious cutting. The above should be an approachable project for someone new-ish to making terrain. Hope it helps someone or maybe generates a better idea for the future!


Leave a reply to Pete S/ SP Cancel reply