I’ve debated what the second post in this series should be. Rationally, going over the scenario creation before we go over the game would make sense, but I know the longer I wait the worse my Course of Action (COA) Analysis will be, so we’re starting there. Let’s start by outlining the mission and forces.
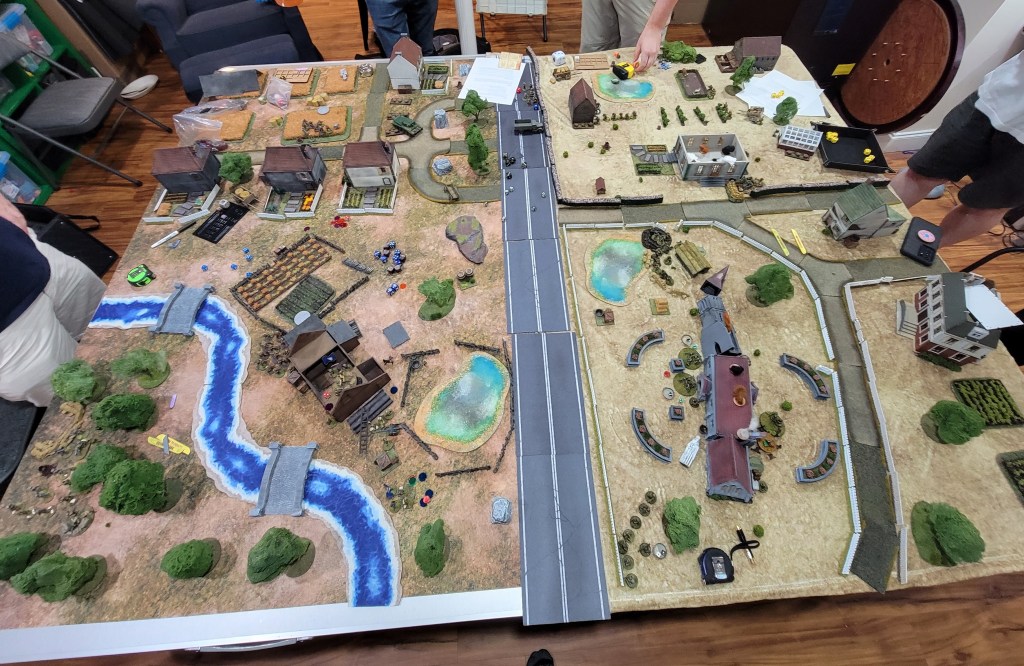
Here’s the map:
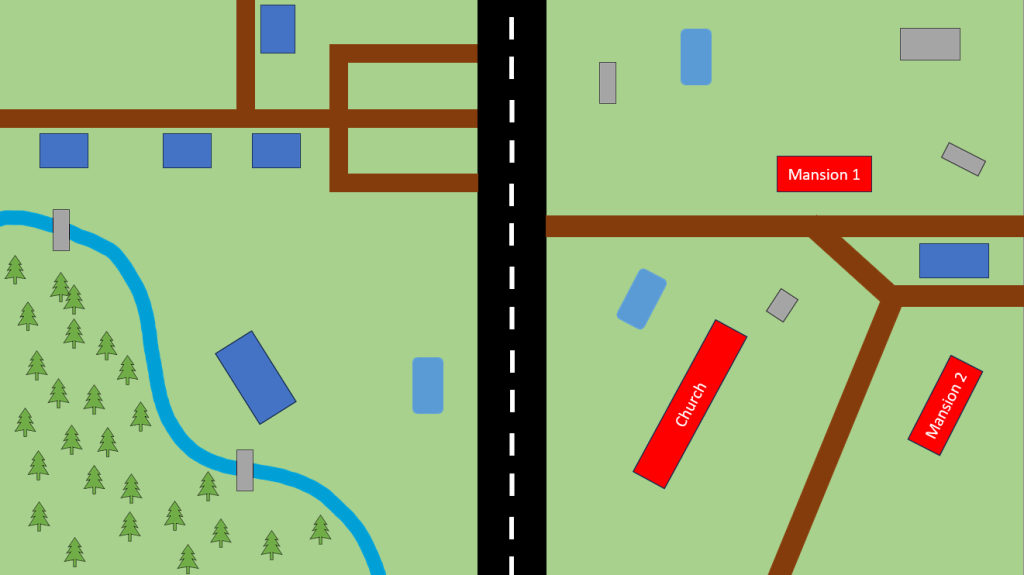
The Mission: Why Did the Tank Cross the Road?
The attackers were tasked with achieving one of three objectives:
1. Capture and hold the central main road. Holding meaning no enemies within twelve inches at the end of a turn.
2. Capture and hold one of the three main buildings. Holding meaning no enemies within twelve inches and a friendly unit inside the building.
3. Destroy all three of the main buildings. This can be done via weapons or via an engineering team blowing up the building by planting charges per the rules for destroying a Road Block, with small modifications. The unit has three charges, and a partially damaged building can be hit with a second charge to guarantee it is destroyed.
The defenders just needed to break the attackers’ morale.
My reasoning behind these will be in another post.
The Forces
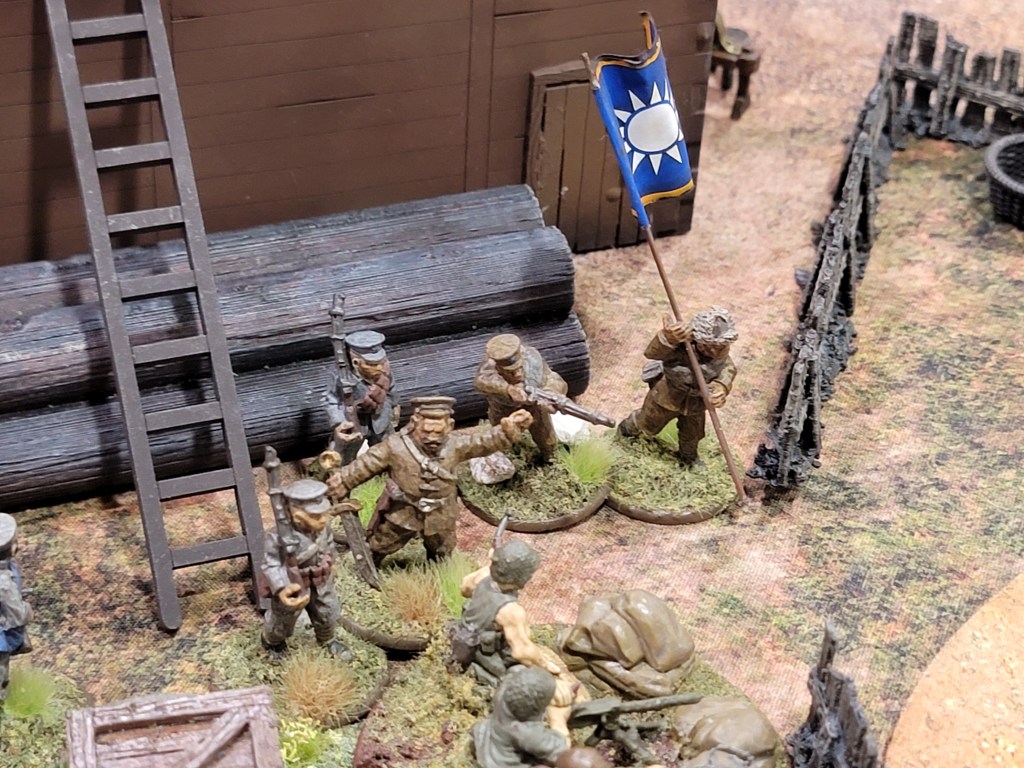
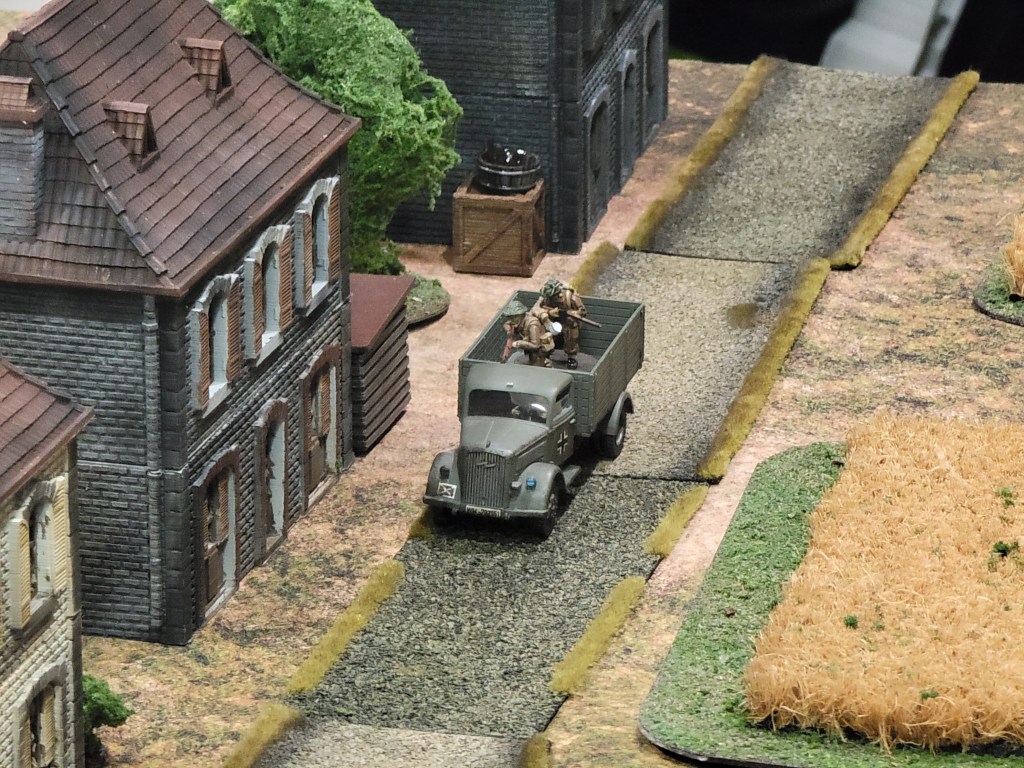
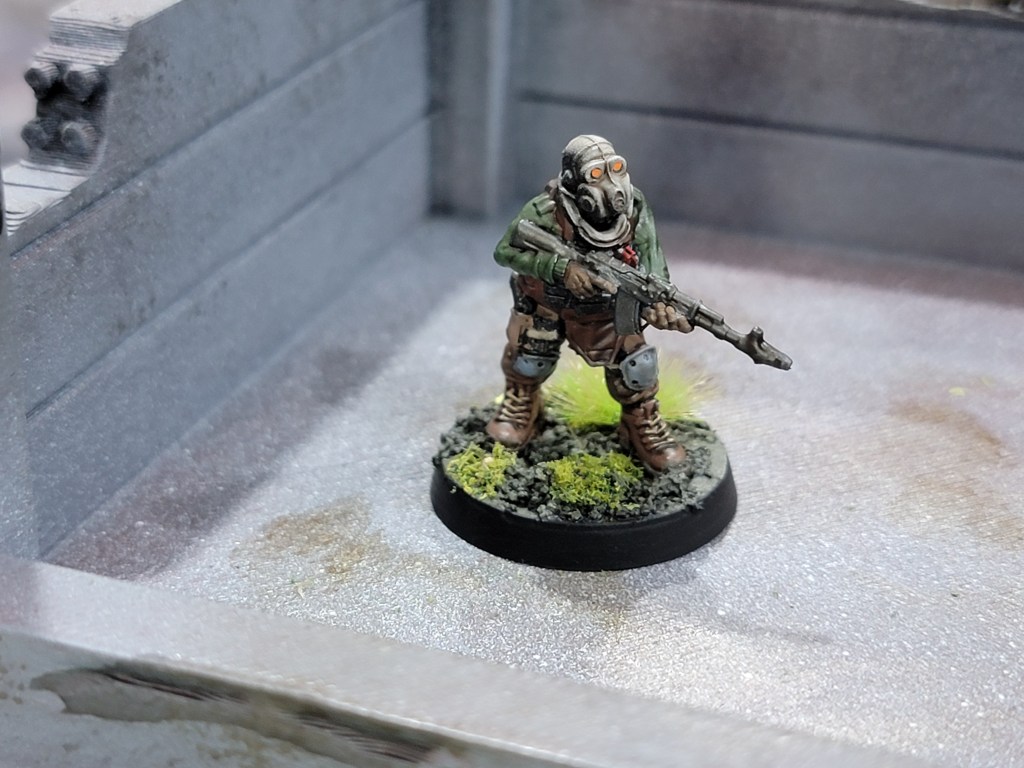
It’s worth noting we were not remotely historical. As the game was learning focused, I let everyone bring whatever they wanted. The result was that we ended up with Americans and British (Defenders, Blue Team) versus Chinese and British (Attackers, Red Team). The Chinese used the German platoon structuring. You will see some German assets on the board belonging to Red Team.
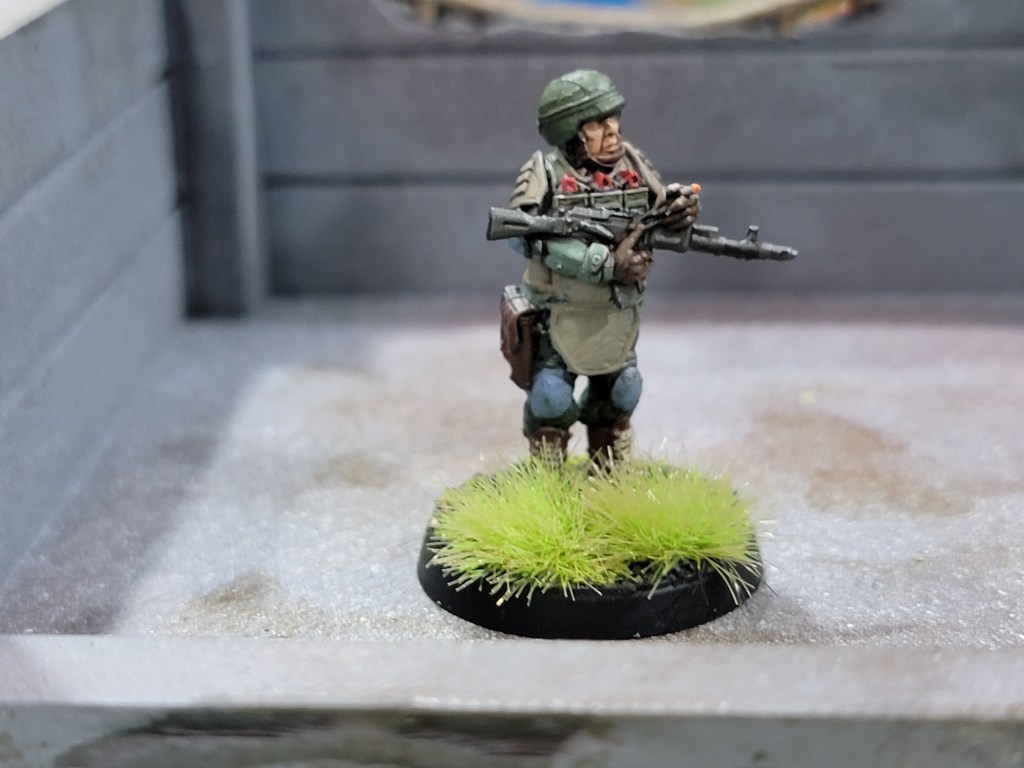
Blue Team (Defenders)
American Armored Rifle Platoon
British Rifle Platoon
1x Pre-Game Barrage
1x 5 point Anti-Tank Gun (British 6 pounder, if I remember correctly)
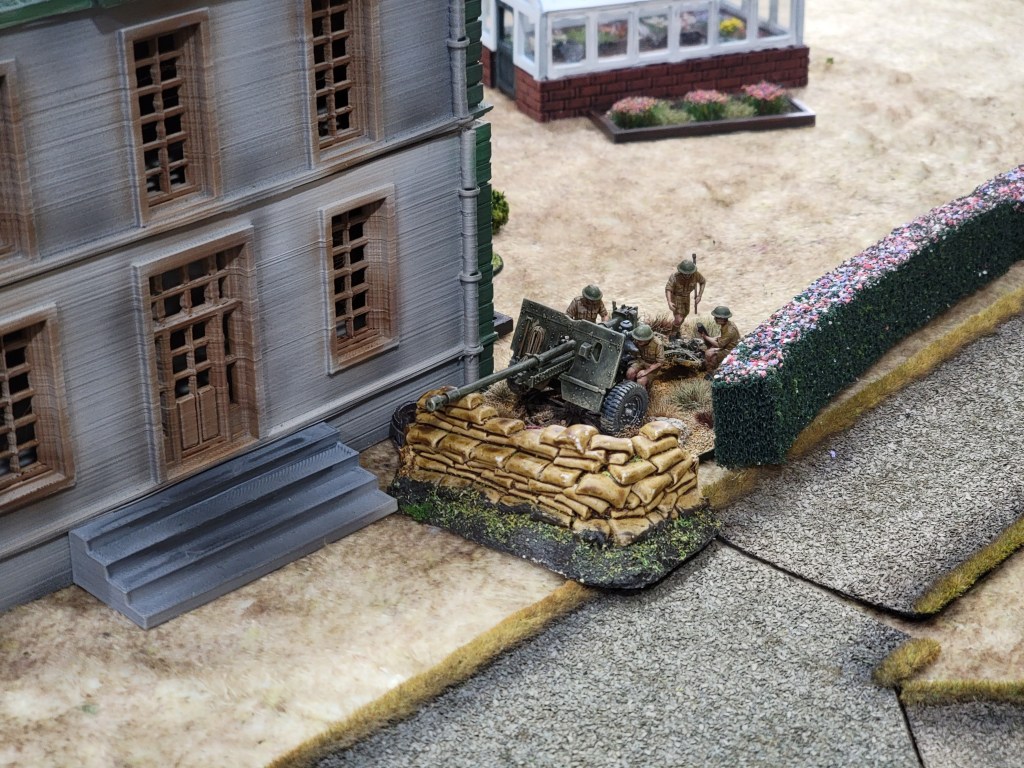
3x Entrenchments (one for AT Gun, two for one American section)
10 points total Support
Red Team (Attackers)
German Rifle Platoon (Chinese)
British Rifle Platoon
1x Cromwell VII
1x SiG 33 Infantry Gun, 5 man with Junior Leader
3x Trucks
1 x Entrenchment for the SiG
1x Engineering Demo Team
19 points total Support
Quick Game Summary
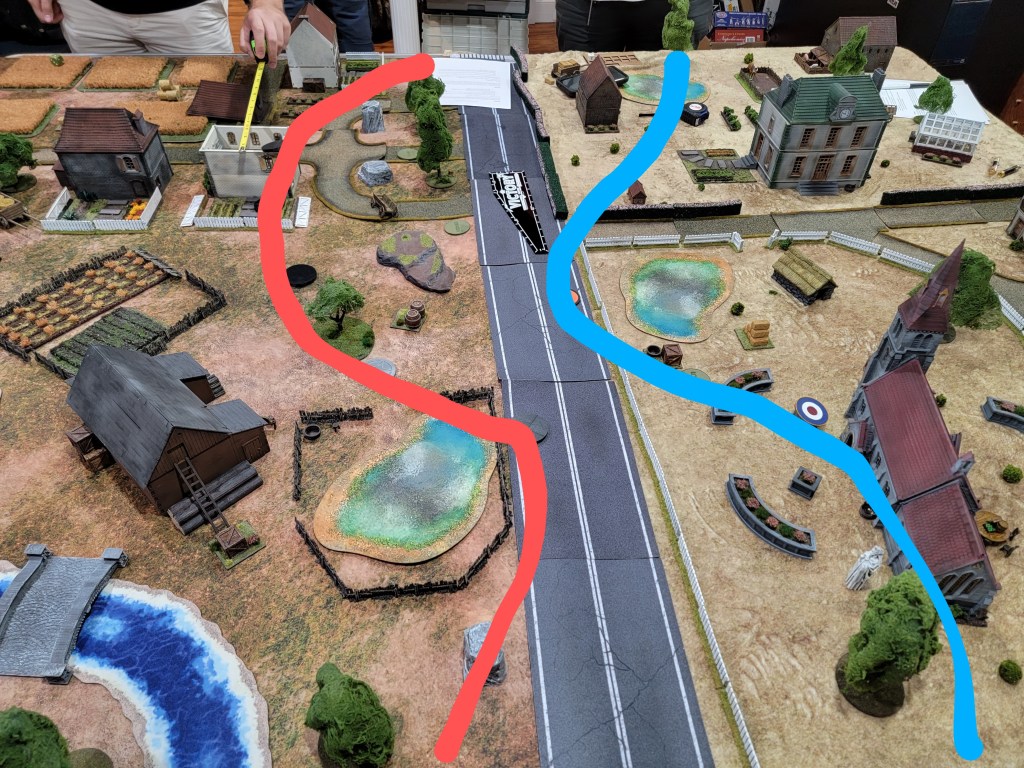
This summary is meant to help the reader gain an idea of what happened so the following COA Analyses have something to hang on. The Patrol Phase resulted in roughly two even lines across the battlefield, creating a fairly flat No Man’s Land, with the exception of the central British JOP.
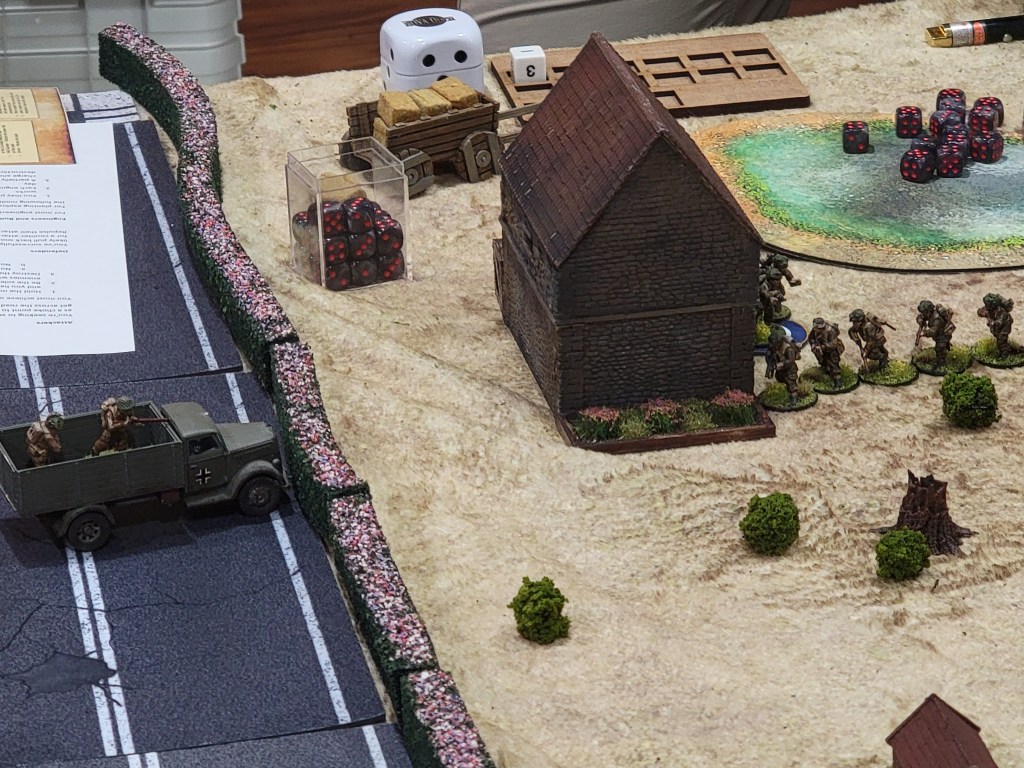
Turn One saw the pre-game barrage hold up Red Team. They came onto the board piecemeal and moved forward piecemeal, which let Blue pick at them and functionally destroy a Chinese section as well as pin down a second Chinese section. This also brought out much of the firepower that Blue had, revealing their general asset positioning early as they tried to capitalize on the ability to concentrate firepower on a few units.
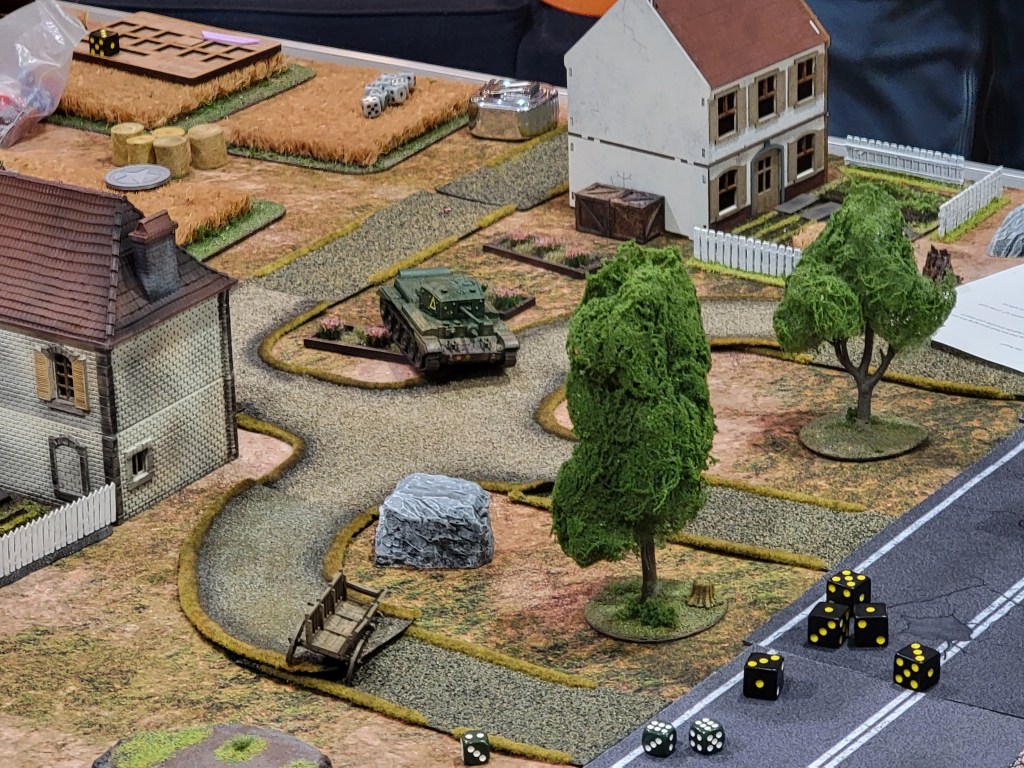
Red brought out the Cromwell, an obvious threat to the buildings, and started positioning it. The AT Gun responded… but due to placement the Cromwell was able to move out of the AT Gun’s line of sight. The Blue response was to land smoke in front of the Cromwell and keep it there to prevent it from being able to shoot the buildings altogether. What few shots it did land failed to destroy anything before smoke blocked its vision.
Of particular note is that the Red British ran a truck all the way down the field—and nothing could stop it. The AT Gun and several rounds of section fire just failed to land and the truck got a single section all the way to the hedgeline.
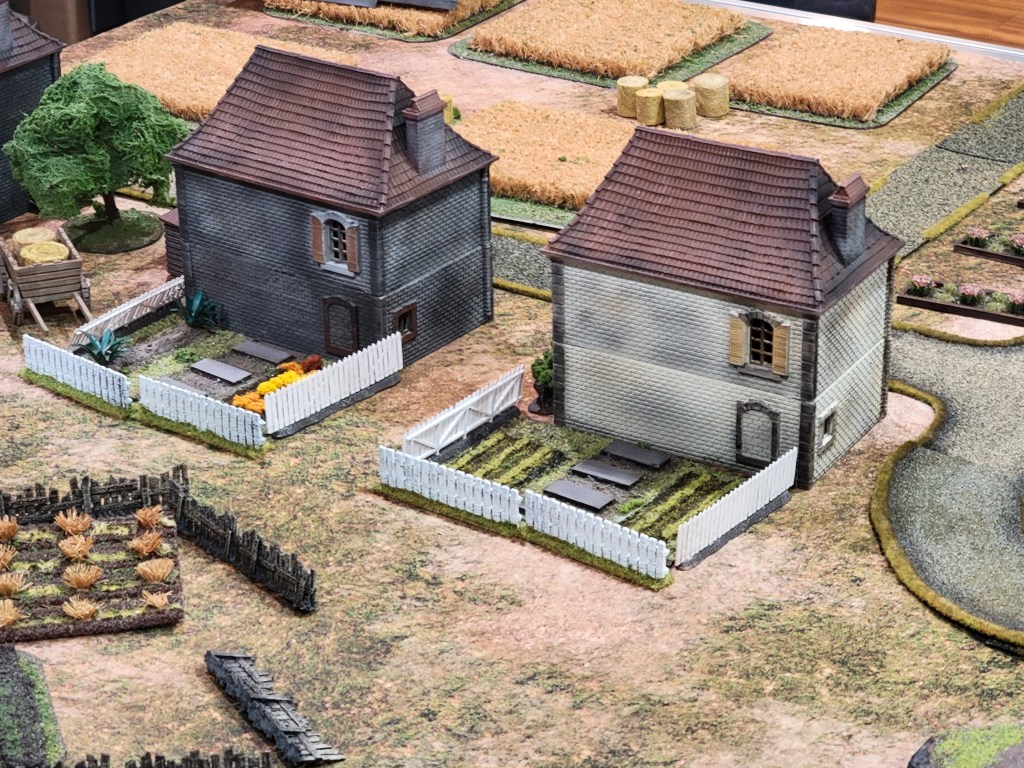
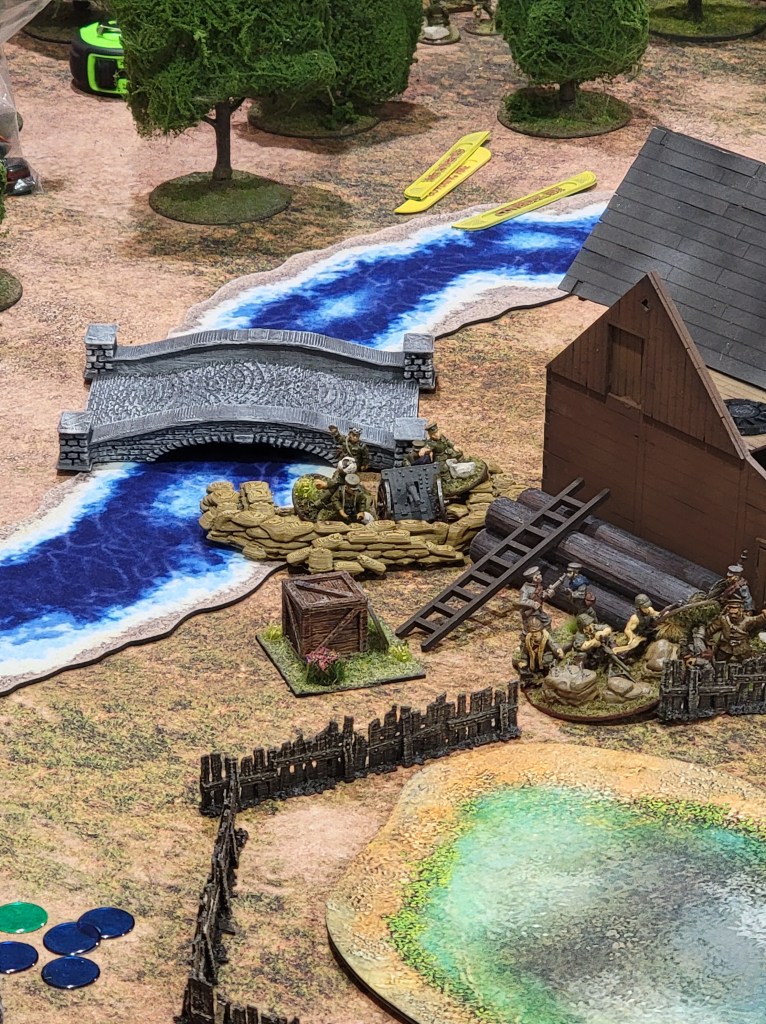
Turn 2 saw the Chinese bring on a SiG 33 Infantry Gun, which immediately started to threaten the buildings. It lit Mansion 1 on fire almost immediately and showed its value. One out of three buildings down.
As the turn went on, the AT Gun was really only able to fire at infantry. Efforts to take out the SiG were stilted by its level of defensive cover, and Blue relied on smoke to keep things under control. Red was still coming on somewhat piecemeal, with a second truck arriving and being immediately disabled by AT Gun fire. Unfortunately for blue, both the SiG and the Cromwell were well positioned and only smoke was holding them back from achieving the objective.
We didn’t quite see it at the time, but Blue was properly under siege—they were just delaying it.
Turn 3 saw the central Red Chinese section flee, but this didn’t do the harm to the Chinese that Blue was hoping for. Red morale sat at 5 points, just shy of taking an ill effects. It seems the Chinese didn’t care about a section running away.
Blue ended a turn to cause the Chinese to run, which cleared the smoke. They were also setting up to charge their American sections forward to assault the SiG and take it off the board, which would have forced additional morale rolls and may have very well ended the game for the Chinese.
Unfortunately, the next round of smoke fell short.
The SiG blew the church completely in one shot.
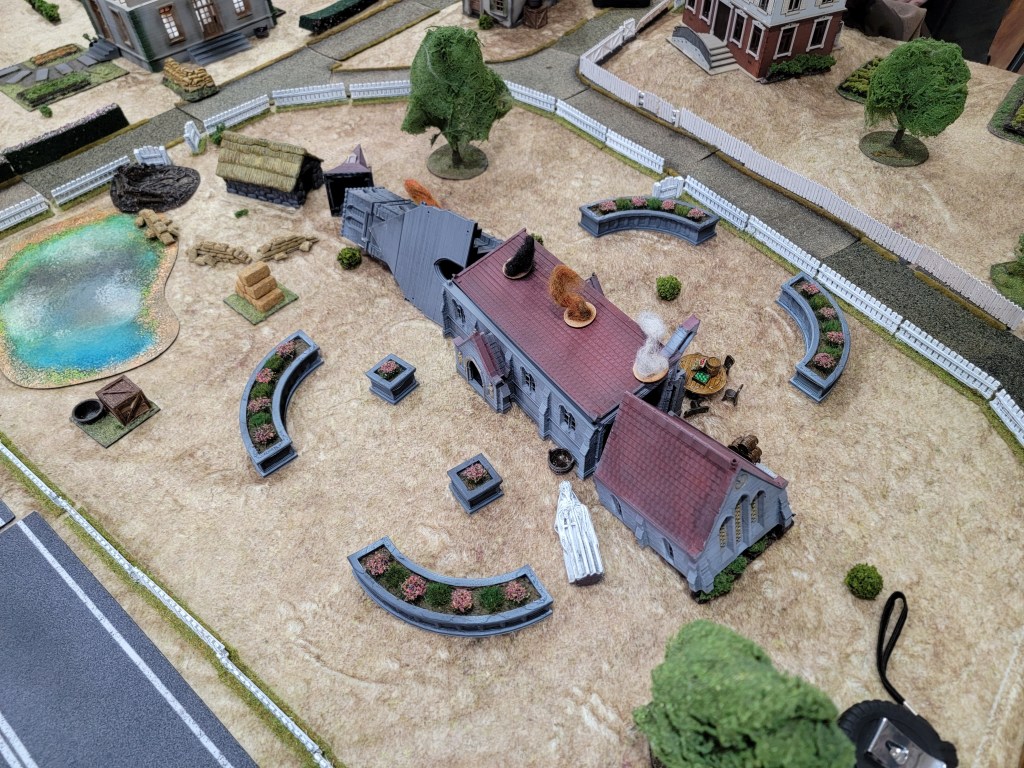
Only Mansion 2 was left, but after some back and forth the Cromwell managed to land that shot and light it on fire. The game was over—despite Blue’s excellent efforts to delay and break Red, Red barely managed to get the shots needed through the smoke gap to be able to accomplish their objective.
It was a nail biter, and a victory truly grasped from the jaws of defeat. Seems the Chinese were right not to care about their infantry running—it was the guns that mattered.
Blue Team (Defenders) COA Analysis
I have more detail here as I was part of the Blue Team’s planning. Blue Team started planning by considering how Red Team would approach their attack. They assessed Red taking a unified front across the board or force concentrating on either flank to land one hard punch. Next, they looked at what Red might bring in terms of support. The assumption was that Red would bring 1-2 big tanks with high HE to knock out the buildings quickly. They further considered Red using armored vehicles to drive down the board quickly and take a building. There was no solid belief Red would be able to take the full road.
Blue, as a result, planned to place their JOPs like this:
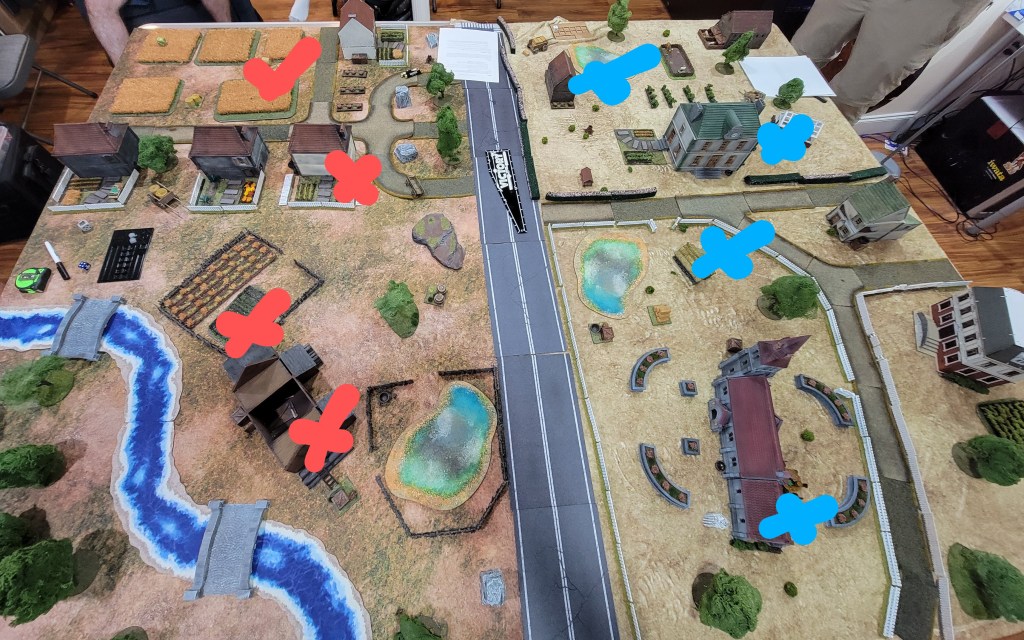
Their intent was to place their Anti-Tank gun in a central location with clear line of sight to both enemy flanks, while having the Americans deploy South and the British to the North. It was a static defense relying on smoke and well positioned anti-tank fire (AT gun, bazookas, and a PIAT) to ward off tanks attempting to blow up the buildings.
The solution to tanks shooting down the buildings was to put smoke in front of them and then angle shots in to blow them up while they were repositioning forward past the smoke. The solution to the potential armored car assault was to have troops in position to ward off arrivals and shoot the armored cars with anti-tank if necessary.
In the event of a force concentration on the South or North flanks, Blue hoped to have enough cross-fire and a well positioned AT gun that would allow them to respond appropriately.
Overall, they accounted for most possibilities and went into the battle with a strong COA and backups. I’d say this was good planning. Now, the real problem: did the plan survive contact with the enemy?
Kinda.
During the Patrol Phase, Red darted their markers up the South side of the board, then lazily moved up the North side to create a clean line across the board. This cutoff some of Blue’s JOP positioning, but Blue adjusted their line to still form a linear front across the board. In the stress of solving this interaction, I’d say Blue mispositioned at least one marker. The way they positioned their central British marker, the AT Gun could not be placed such that it had clear line of sight to the whole board. Mansion 1 would both protect and block the AT Gun. This proved fatal to the overall Concept of Operations (CONOP), as seen in the earlier summary. Had the AT Gun been better positioned, Blue could have taken out the Cromwell.
This mispositioning happened because the Patrol Phase was extremely involved. Blue found themselves trying to use their patrol markers to both shield against Red incursion and get their units properly positioned. This led to a lot of back and forth between the Blue players over where to place their markers to the South where they were on the receiving end of Red interference. This seemingly distracted them from the placement of markers to the North.
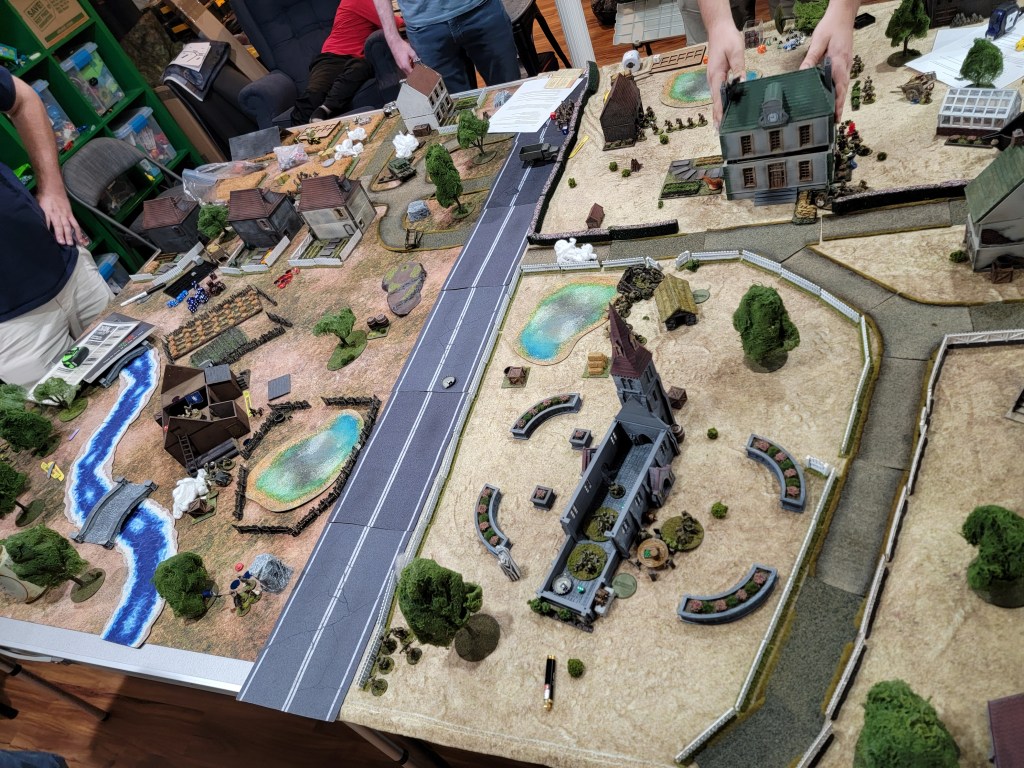
The Americans were able to take the church and put two mounted LMGs inside, which output a ton of fire, per their plan. This proved very useful in shutting down the Chinese advance, but could never quite handle the unanticipated SiG. Blue failed to solve how to take the SiG out. This was one of those moments where as Headquarters, I was dying inside. I wanted to shout at the Americans to move forward and assault the SiG. They may have taken losses, but destroying it would mean taking away half the enemy threat to the buildings. It would have been game changing, but to give them this advice they had to end a turn which cleared the smoke which allowed the SiG to do its job.
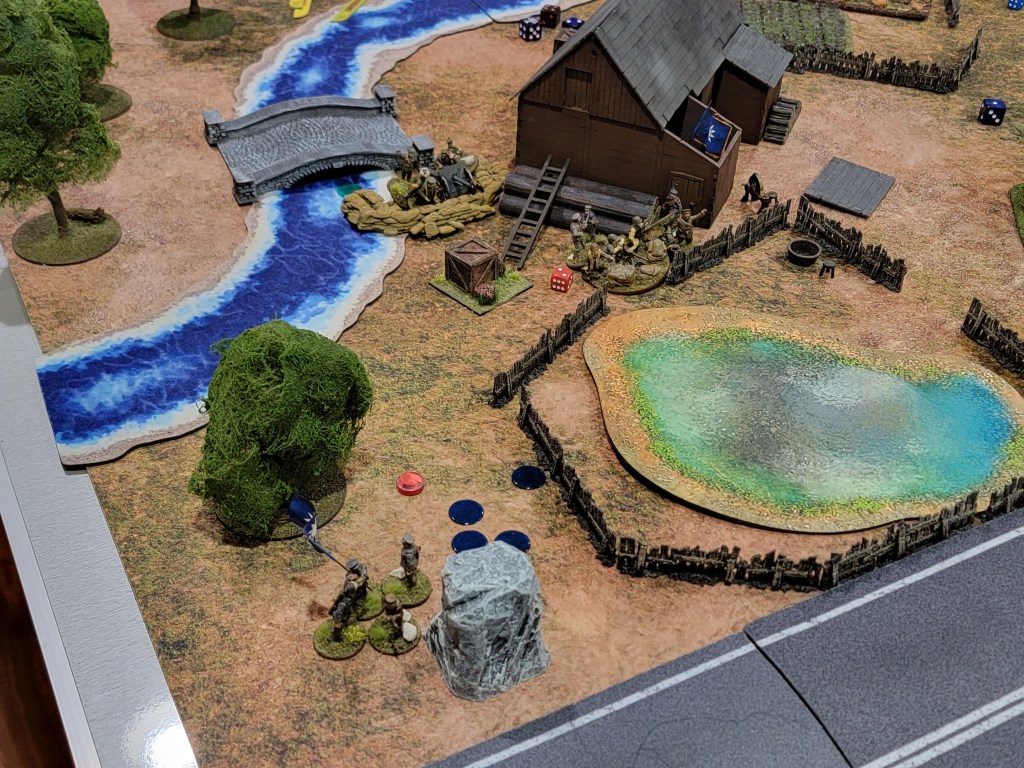
I could perhaps dissect more. We could talk about how the British sections didn’t quite move forward well enough to maximize firepower, or how we allowed the stable to block a lot of potential firepower, but really it came down to these two mistakes:
1. The AT Gun was incorrectly positioned.
2. The Americans should have assaulted sooner rather than staying back.
I don’t blame Blue for this. These are hard decisions. Losing the AT gun would have been terrible if Red had a second tank, and the decision of when to counter-punch while on defense is sincerely difficult to settle. It’s easy to see in hindsight, but I really believe the COA they went with was very well thought out and deserved a win as much as Red did. The idea of using smoke to force the tank forward was well executed and did get an almost fateful shot off from an American bazooka—they got two points of shock onto the tank. One more shot may have flipped the whole game, but smoke proved to be a double edge sword as it allowed the Cromwell to position itself to take shots at the buildings without being vulnerable to incoming fire.
They also did a great job of holding back assets and placing them with deliberate intent. They managed to pin Chinese out in the open while the Chinese were moving. They did so many things well that had either of the above two issues been resolved, I think they would have absolutely won the game—no nail biter at all.
Red Team (Attackers) COA Analysis
The Red Team initially planned to leverage multiple trucks full of troops in order to feint on the north side of the board, then mass firepower on the South side once the defenders committed North.
This likely would have baited Blue into an over-deployment to the North and then left them with too few assets to the South to handle the SiG. Overall, not a bad idea and it would have likely put the defenders under siege, forcing them onto the offensive if they wanted to win.
Of course, there was the possibility the defenders mis-deployed such that Red could land the trucks and actually take Mansion 1—all the better if that’s the case.
I like this plan on paper. In practice, it didn’t quite play out. For one, the bombardment made it harder for Red to bring on the trucks reliably, so instead Red attempted to bring them on one at a time.
Secondly, they placed the tank to the North, which stopped them from truly “Massing” firepower to the South. This did, however, cause Blue to misposition their AT Gun, so mission accomplished in a sense.
Red’s plan to drop the SiG to the South, positioned such that it could both attack the church and attack Mansion 2 on the hill was a great idea. Again, Blue did not anticipate a high HE infantry gun being used to topple the buildings. The assumption was always that it would be two heavy tanks or an infantry run.
This is why the feint, had it been executed correctly, would have worked quite well. Blue would have assumed they were up against an effective blitzkrieg and reacted accordingly, leaving Red to safely deploy heavy firepower to the South and knock the buildings over.
Similar to Blue, I can nitpick, but really two things hurt Red the most and almost cost them the game:
1. They came on piecemeal, which let Blue pick at them as they arrived.
2. They took too long to deploy the SiG, and had Blue capitalized a little more on the piecemeal deployment, the SiG may very well have never gotten much of a chance to fire.
Thankfully for Red, they did deploy the SiG just in time for it to take down the enemy buildings before the Chinese broke. Red’s plan was solid, but the execution could have used work.
A method of recovering from the bombardment would have been to mass troops in a staging area on board, such as by hiding them behind the barn or in-between the houses until enough units were on board to start the assault. This carries its own issues but may have helped Red to build a more coordinated attack. The trucks could have landed out of harm’s way and then raced down the board together, pulling off the feint proper.
Honestly, watching as the bombardment so heavily affected the Red COA was very interesting. One element of Defense in Depth is the inherent idea that an attack will fall apart if given time. It’s hard to coordinate an assault and because they’re so mobile, attacks tend to unravel. This game was a great example of that notion, but Red managed to pull it back together just in time.
My hat’s off to my opposing Headquarters—he did a great job planning, watching his players deviate, and then managing to wrestle them back onto plan.
Conclusions
Both sides learned a lot and executed much more advanced plans. My objective was to up the level of play in our group and I firmly believe it was mission accomplished. The game was fun to watch and I honestly feel that small tweaks on either side—force support choices, positioning, etc.—would have made for very different games.
I believe Blue did a better job of executing their plan, but the Red plan pulled off its most critical element: the surprise of the SiG 33. I walk away feeling like I could easily replay that exact scenario and board with the same players and would have even more fun the second time because they’d be able to reapply lessons learned and possibly flip the script altogether.
Congratulations to Red on a great victory and congratulations to Blue on strong COA execution. Great game, well played.
This one will be hard to top.

Leave a comment